Disclosure: This post may contain affiliate links. I earn a small commission of product sales to keep this website going.
When photographers are presented with a high-contrast scene, one in which there’s an extensive range of tones from dark shadow areas to bright highlight areas, there have been two traditional choices for digital photographers:
- Accept that your photo will have a lot of contrast, and choose which tonal area to expose for, or
- Create a bracket of exposures for all tonal areas, blending them into a single High Dynamic Range (HDR) image in computer software.
Sometimes neither of these is satisfactory. All tonal areas may have important pieces for your photo; you don’t want them obscured by bright light or a total lack of light. However, you can’t create a bracket of images unless you’re photographing still life.
Is there any other way to handle this? Yes!
As Fujifilm photographers, we can do several different things to retain this information in a high-contrast scene’s wide range of tones.
In this article, we’ll look at different ways of photographing high-contrast scenes in Fujifilm cameras, from RAW photographers capturing a single frame to JPEG photographers with no desire to post-process photos.
Walkthrough demos are processed using Fujifilm X RAW Studio for an accurate representation of in-camera steps.
High-contrast scenes and single-exposure RAW photos
Dealing with a high-contrast scene when you have the RAW file is much easier than if you’re only recording the JPEG. So that’s one way to start. But there’s a little more to it than that.
Display settings
You’re likely not seeing an accurate depiction of what the RAW file will look like if you’re using the default camera setup. You won’t be exposing that RAW file correctly, and that’s because the screen is showing you the JPEG preview, which includes settings like the film simulation and tone curve.
You’ll need to see the natural view with all those picture effects turned off. So, depending on which camera you have, go to the SCREEN SETTING menu and
- Turn NATURAL LIVE VIEW ON, or
- Turn PREVIEW PIC EFFECT OFF (older cameras)
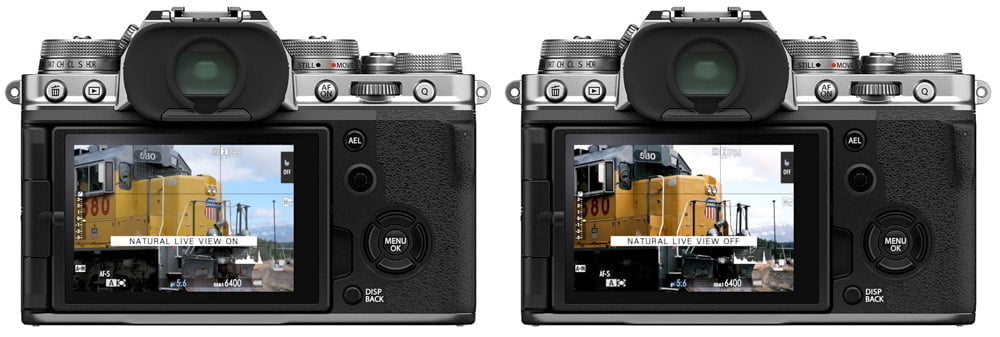
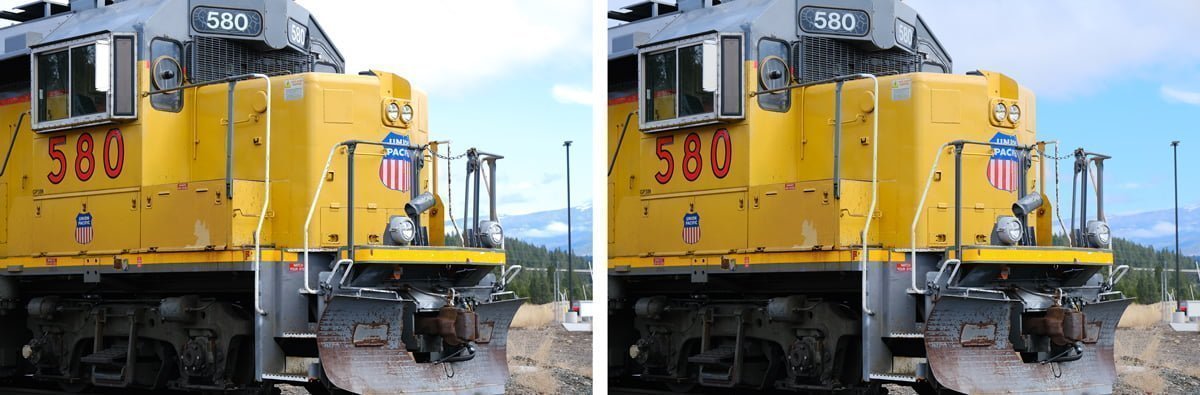
This will give you closer to the “RAW” view so you can more accurately expose to capture the broadest range of tones in a single exposure. Despite it being closer to the “RAW” view, your RAW file will still look slightly different. But it won’t have all of those film simulation settings and tone curves added.
Protect the highlights
You’ll also record the greatest amount of tonal information possible if you overexpose. This technique is called Exposing To The Right, and countless sources on the Internet describe this in detail.
You don’t want to “clip” your highlights; you want it as bright as possible without any part of the scene recording “pure white.”
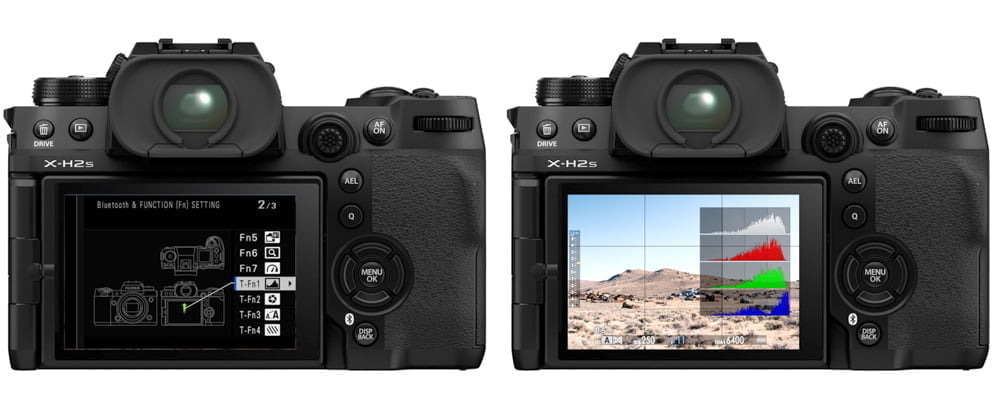
Use the large histogram to help you with this.
In Shooting Mode, press & hold the DISP/BACK button. Assign a control to the HISTOGRAM function. I assigned this as the touchscreen “swipe up” on all my Fujifilm cameras.
When viewing the natural “RAW” view on my screen and wanting to “expose to the right,” I just swipe up to see both the large histogram and the live view highlight alert. I increase my exposure just until the highlight alert starts blinking at me, then dial the exposure back down at least a third of a stop. I swipe up again to turn the large histogram off and then capture the photo.
This larger histogram is not available in older Fujifilm cameras. The Live View Highlight Alert is, enabled in the DISP. CUSTOM SETTING submenu found in your SCREEN SETTING menu.
In very high-contrast scenes, however, you may not be able to protect all highlights. Especially if it’s a light source, like the sun. Get your shadow areas exposed how you want them and accept that these light sources or glare are going to be white.
Dealing with contrast when shooting for the JPEGs
We just looked at the RAW files – which require processing after capture.
One of the main reasons why so many of us love our Fujifilm cameras is for the amazing in-camera JPEGs that we don’t need to process.
So how do we handle these high-contrast scenes when we don’t have as many post-processing options?
Start with the film simulation
As taught in our Creating Unique Fujifilm Film Recipes course, the film simulation is your “base” for all other settings. All additional tonal and color settings are applied to the tonal and color settings of your selected film simulation. So it’s important to consider how this reacts to the contrast in the scene.
Velvia, for example, is going to add even more contrast to a high-contrast scene. Nostalgic Neg will really lighten up the shadow areas. Classic Neg is going to add a lot of contrast to the highlight areas, but not as much to the shadow areas. Our free Learn Fujifilm Film Simulations course takes you through all of those characteristics.
When you want to retain more tonal areas in high-contrast scenes, I’d recommend Eterna if your camera has it, or Astia (to retain highlights more) or Provia. You still have some ability to adjust tint, saturation, and additional contrast on these film simulations.
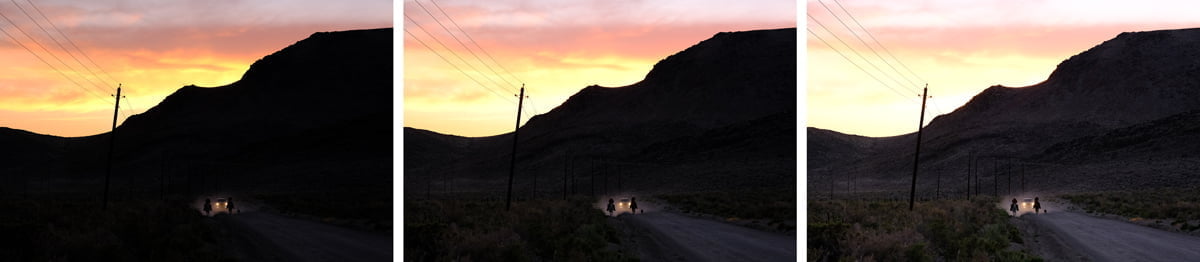
Dynamic Range settings
After the film simulation, the next thing I’d do is look at the Dynamic Range settings. This setting “pulls down” the exposure in the highlights while retaining your exposure in the shadow areas.
The mechanics of how it does this are explained in this article about the Dynamic Range settings if you want to know more.
In high-contrast scenes, I would not recommend DR100 or DR AUTO. The auto setting often doesn’t “kick in” when I think it should.
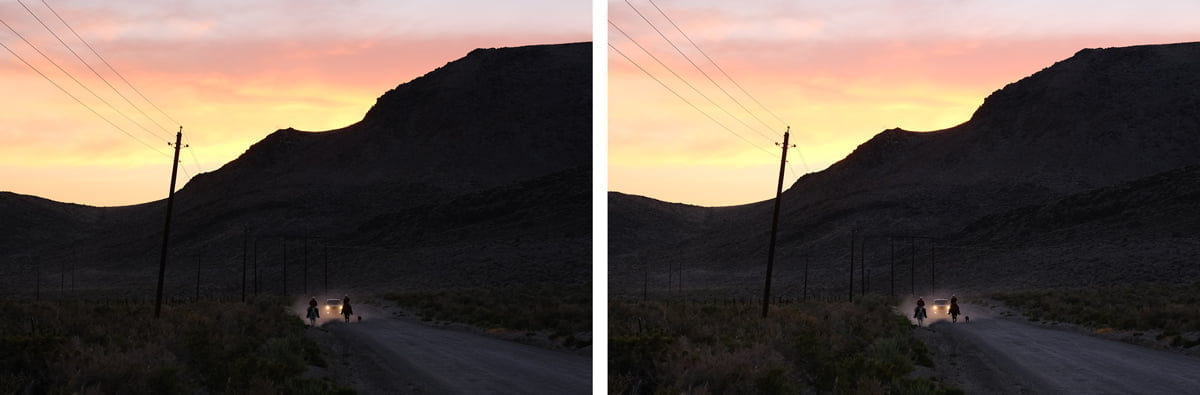
DR200 is a good setting for moderate and high contrast, and DR400 for high contrast. Sometimes I feel that DR400 looks overly processed, so experiment with it to suit your tastes. Push your exposure up until your shadows are exposed closer to how you want and then try either DR200 or DR400 to see if that brings the highlights down enough.
Fujifilm cameras also offer a DR bracket setting (it captures a photo with each DR setting) so you can choose which looks best. There’s also a Dynamic Range Priority setting, which I’m not a fan of because it gives up too much control.
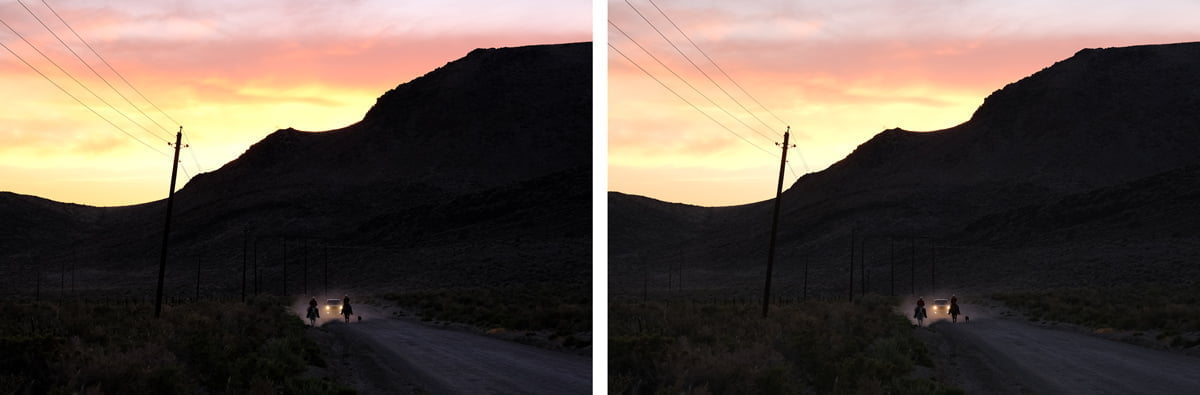
Highlight and Shadow Tones
The Highlight and Shadow Tones settings (Tone Curve in new cameras) let you add or reduce the contrast of your film simulation. And if you’re using Dynamic Range, it will further add to this.
So in a high-contrast scene, you probably want to reduce the contrast from the film simulation. To do this, set negative numbers for the highlight and/or shadows.
Below, we keep going in our steps and set HIGHLIGHT -2 and SHADOW -1.
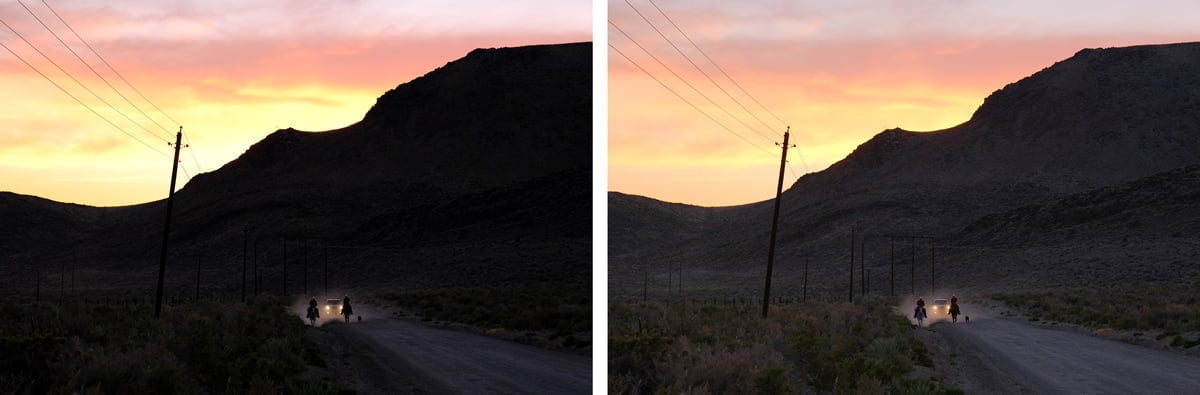
Beware of overdoing it with this. Going to -2 on both Highlights and Shadows can sometimes lead to an image that appears overly processed.
You can read more about the Highlight and Shadow Tone settings in this article.
High Dynamic Range
All of the settings we just discussed were for handling contrast in a single exposure, without blending multiple exposures.
Newer Fujifilm cameras also have an HDR setting which I do want to briefly mention. Get to this by either selecting HDR on the drive dial or pressing the DRIVE button and selecting HDR. This will vary from camera to camera. You’ll also select an HDR setting; if you have the dial with the HDR position, do this in the DRIVE SETTING submenu under the SHOOTING SETTING menu.
This can be an option for JPEG photographers; the camera will capture three photos and blend them into a single photo. However, if there is any movement in your frame at all – either in front of your camera or the camera itself – the final photo will show these movement artifacts.
Conclusion
Sometimes contrast is good. But sometimes you want to show more tones, more than regular camera settings can do.
As you can see, there are many ways to deal with high-contrast scenes in Fujifilm cameras.
If you’re photographing RAW, disable your Image Quality settings from the on-screen preview. Also utilize that large histogram to expose to the right.
If you’re photographing JPEG, be mindful of your selected film simulation, use the Dynamic Range setting, and adjust your highlight and shadow tones.
These solutions won’t work for every scene, but it’s something that you can experiment with and practice when presented with a high-contrast scene!
Do you have anything else to add? Let us know in the comments!
Tom
Tuesday 12th of December 2023
Thank you so much Amazing explanation, I was struggle with high contrast and didn't know how to use Dynamuc range , now I kbow all the tools
John Peltier
Wednesday 13th of December 2023
High contrast scenes are tricky but there a plenty of ways to deal with them :)
Joost
Friday 14th of July 2023
Thank you John for your teachings. I, as an amateur photographer, learn a lot from your helpful tips and articles!
John Peltier
Saturday 15th of July 2023
Glad it’s helping, thanks for the feedback!