Disclosure: This post may contain affiliate links. I earn a small commission of product sales to keep this website going.
Buried deep in Nikon’s endless menu options, towards the end of the Custom settings b group, you may have skipped past Fine-tune optimal exposure without thinking about it. What is this setting, and why would you use it?
This article will describe what Fine-tune optimal exposure does, along with a refresher on how Nikon cameras meter the exposure.
How do cameras meter exposure?
Despite all the smart things being added to cameras with every generation, they’re still quite dumb. What I mean by that is they don’t know what you’re photographing.
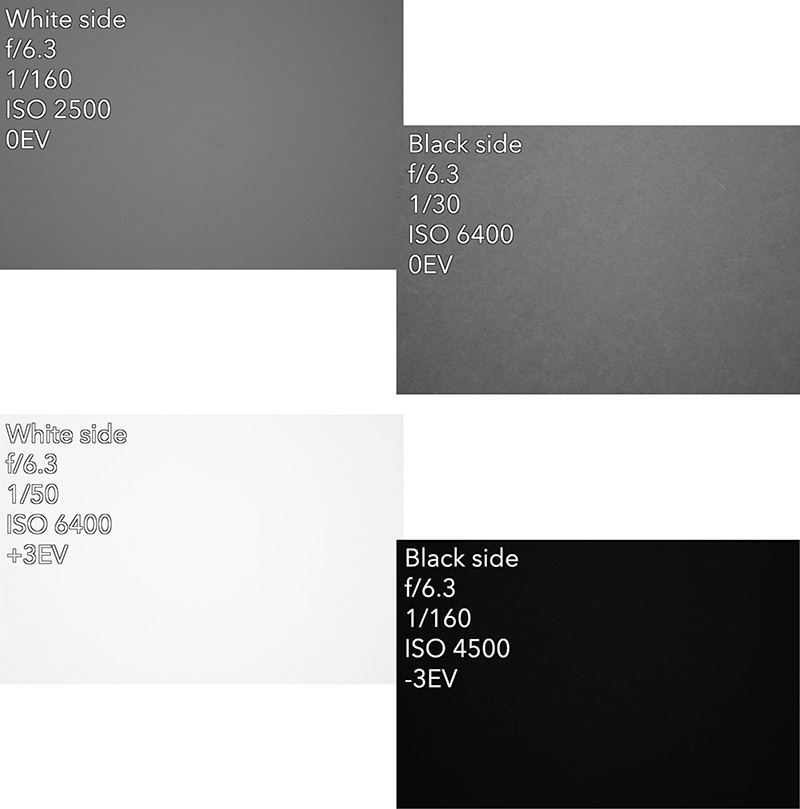
Are you photographing a bright snowy scene? Or a dark candlelit interior?
The camera just doesn’t know. It doesn’t know how bright that scene should be. So it’s just going to tell you, “Your optimal exposure should be a middle-gray tone, between black and white.”
If you’re metering on that bright, snowy scene, it’s gonna say, “Whoa, that’s way brighter than gray!” And if you’re metering on that dark candlelit interior, it’s going to say, “Hey, that sure is a lot darker than gray.”
This can create major problems if you’re not using Exposure Compensation in the automatic exposure modes (Auto, P, S, and A).
In Manual exposure mode, the camera meter is going to tell you how much brighter or darker than gray your measurement is.
But where and how is that measurement happening? Those are the metering modes.
Metering modes in Nikon cameras
Nikon cameras have four main metering modes found across nearly all models. These are found in the Photo Shooting menu.
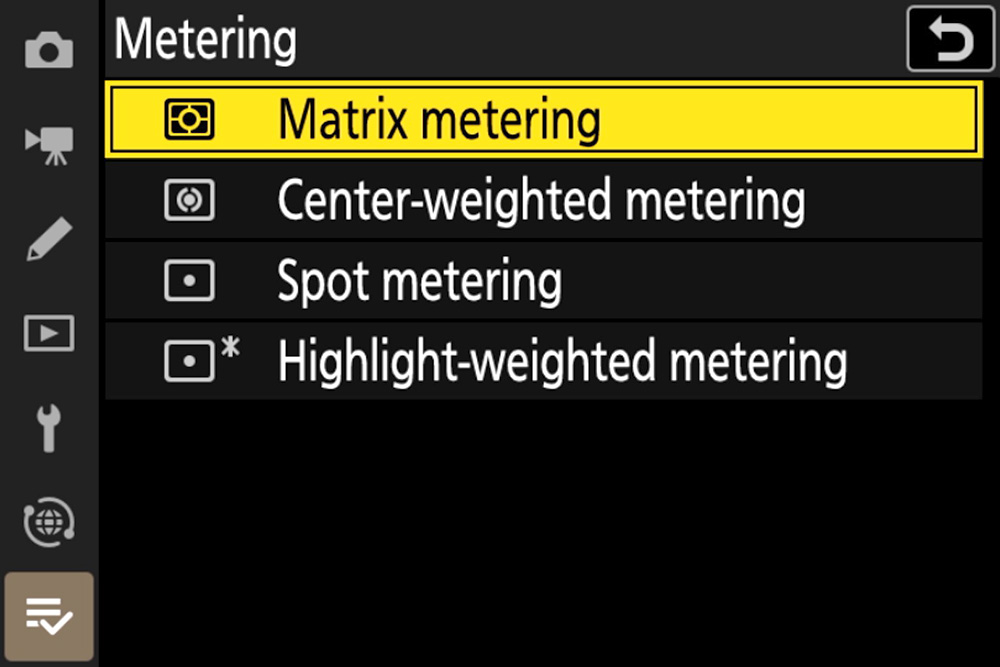
- Matrix: The smartest metering mode takes into account tonal variations throughout your photo, colors, and even your composition. It then comes up with a meter reading and can produce quite natural results.
- Center-weighted: This mode, which has been around for some time, takes a simple average of your entire frame. However, it assigns more priority to the center third or so of the frame. This is where it assumes your subject is for a portrait, and that area should have the most “weight” in the average.
- Spot: This is your laser measurement, only measuring about 1.5% of the frame and ignoring everything else. It allows for great precision when taking a reading. This Spot is tied to your focus point in most cameras, allowing you to move the measurement location around the frame.
- Highlight-weighted: Think of this as like Center-weighted, but instead of assigning the most priority to the center of the frame, it assigns the most priority to the brightest areas of the frame. This can help you avoid blowing out the brightest areas of a high-contrast scene; it will want to underexpose so those bright areas are darker.
We go into all of these modes in much further detail in the Nikon Z Photography Fundamentals course.
Fine-tune Optimal Exposure
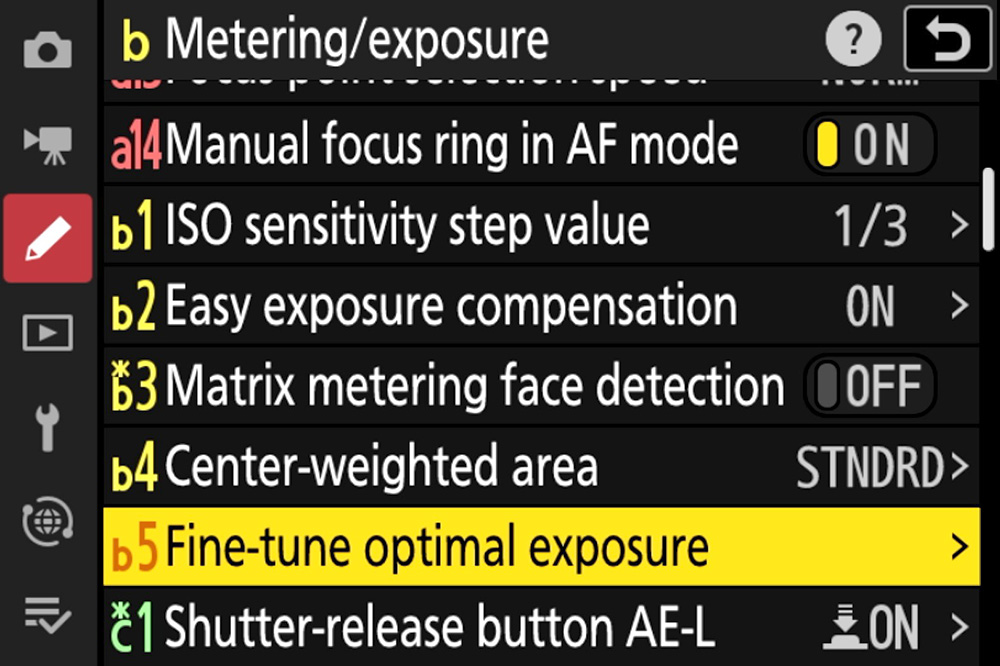
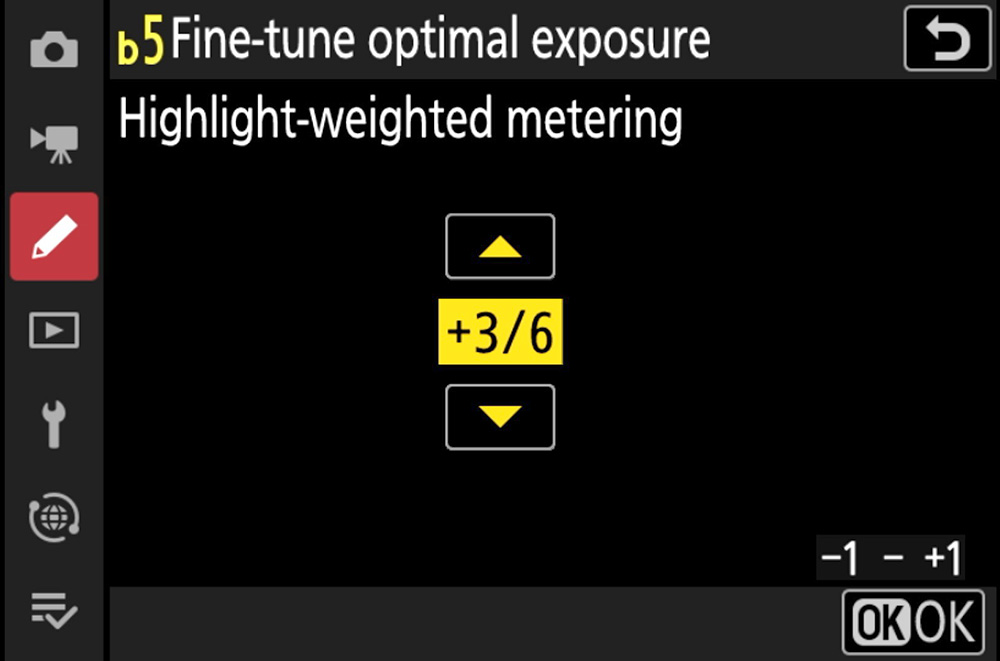
The Fine-tune optimal exposure setting, found in the Custom settings b (Metering/exposure) group, is an exposure offset.
If Matrix is metering too dark for your style – your photos are darker than you want them – you can do two things:
- Intentionally overexpose every single photo, knowing that the camera wants to make it darker than you.
- Program Fine-tune optimal exposure with a positive value.
Perhaps it’ll be easier to understand by demonstrating how I use Fine-tune optimal exposure.
A use case
As a disclaimer, I’m in Matrix mode 99% of the time. And I use the histogram as an additional exposure tool.
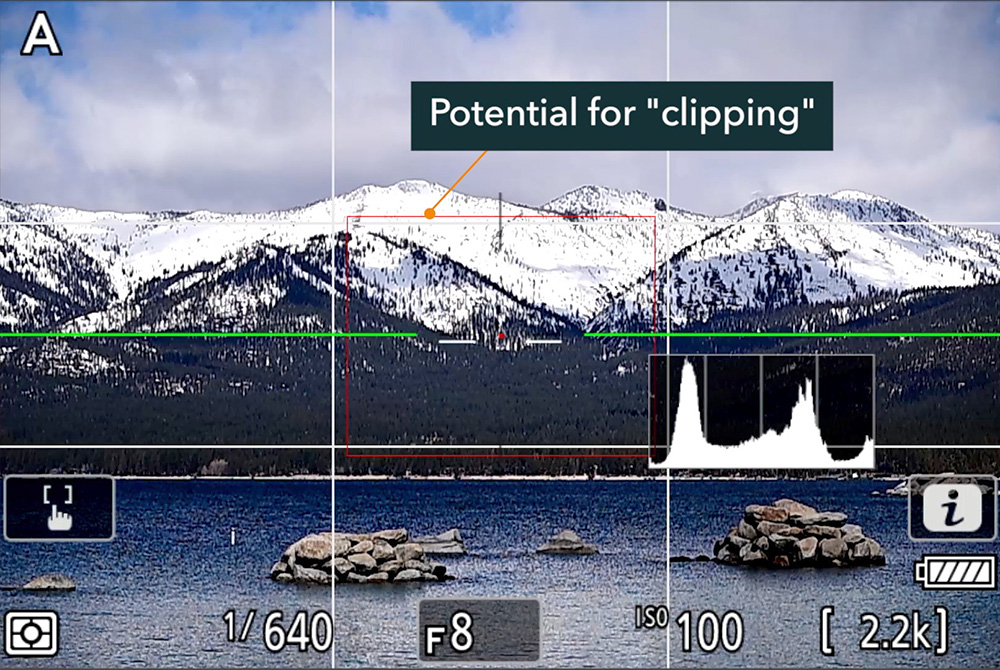
However, in really bright scenes where protecting the highlights is more important than getting a perfect in-camera exposure, I might go to Highlight-weighted.
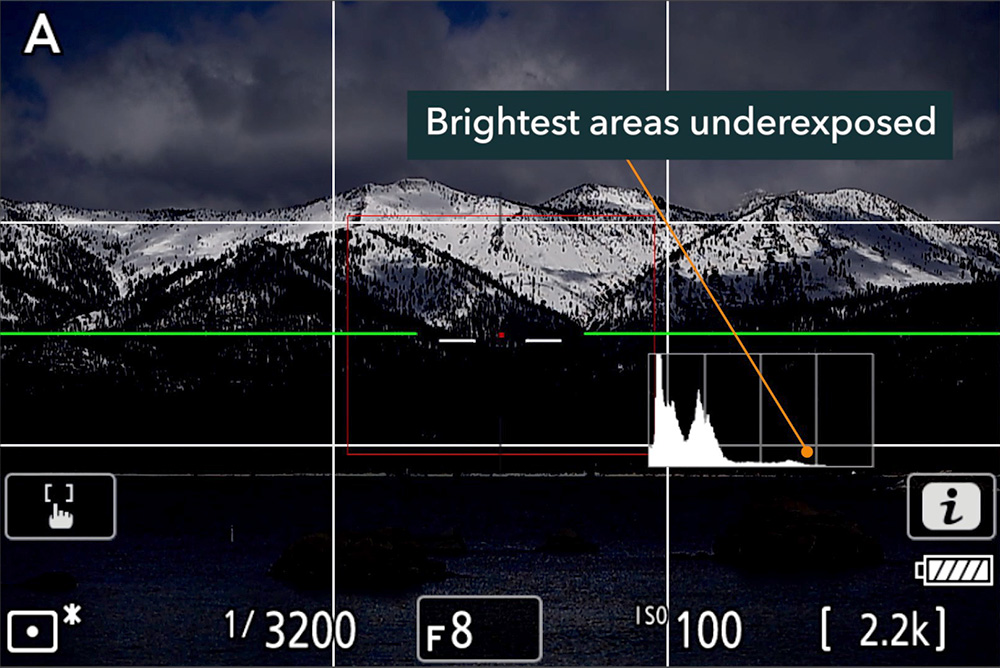
I find Highlight-weighted just underexposes too much. Sure, I want to protect the highlights, but I don’t need them gray. Go ahead and make ’em bright, not too bright, but I don’t need the rest of the scene to be almost black. My wish is for Highlight-weighted to not underexpose so much.
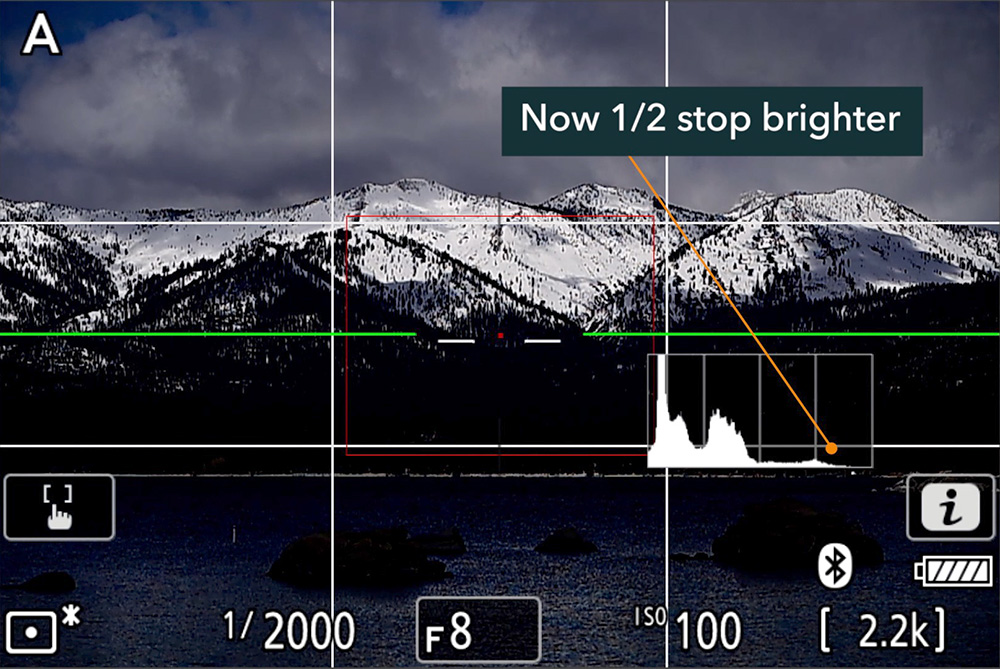
Enter Fine-tune optimal exposure. I’ve programmed a +3/6 offset for Highlight-weighted. Now, whenever I use this metering mode, the camera will overexpose by half a stop all the time. Not too much, but enough to give me some of my shadows back while still protecting the highlights.
Using Fine-tune Optimal Exposure
You’ll get a “warning” when you enter this setting. It’s telling you that, when you have an offset programmed, there’s no reminder of that while you’re shooting. In my example, when I have 0EV set while using Highlight-weighted, it’s actually +1/2 from 0. But the camera display shows 0. It’s up to you to remember you’re using this.
Select which metering mode you want to offset, press the multi selector right, and then use the up/down arrows to program from -1 to +1 in 1/6-stop increments. Play around with it until you “fine-tune” it how you want for that metering mode.
That’s the gist of it!
I’d recommend only using this if you know you want an offset 100% of the time for a specific metering mode, like me with Highlight-weighted. Otherwise, if you’re over or underexposing for stylistic purposes on a specific shoot, make those adjustments manually for that shoot. You shouldn’t have to come into this menu more than a few times over the life of the camera.
How will you use the Fine-tune optimal exposure setting? Leave a comment with your ideas or if you have any other questions about this setting.
If you want to learn more about Nikon’s exposure modes and exposure settings, I have several chapters devoted to this in the Nikon Z Photography Fundamentals course. You can watch free previews at the link and use the code “blog20” for 20% off your purchase.