Disclosure: This post may contain affiliate links. I earn a small commission of product sales to keep this website going.
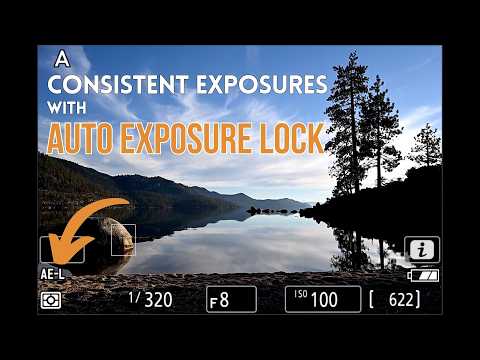
If you have ever photographed a simple scene and noticed that each frame looks slightly different, you have already discovered why Auto Exposure Lock exists. When the camera meters a scene, it recalculates exposure every time you move, even a little. That can lead to a darker first frame, a brighter second one, and an inconsistent set of photos, even though the light has not changed.
Auto Exposure Lock solves that problem.
Before we get into how it works, it helps to understand the exposure modes that control how your camera decides brightness.
A Quick Exposure Mode Refresher
Most cameras offer four basic modes: Program Auto (P), Aperture Priority (A or Av), Shutter Priority (S or Tv), and Manual (M).
Only Manual gives you full control. In the other modes, the camera still selects at least one exposure variable. Exposure Compensation lets you shift the result, but the camera is still doing the math based on its meter.
If you want a refresher on how these modes work, you can go through my free Exposure Triangle for Beginners course. It will help everything in this article click.
What Auto Exposure Lock Does
Auto Exposure Lock lets you tell the camera to stop recalculating exposure. Think of it as a temporary manual mode.
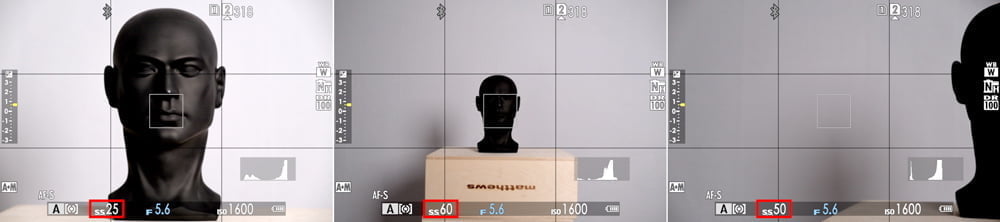
Without AEL, exposure changes every time you recompose because the camera is metering off whatever area dominates the frame. For example:
- First frame: mostly dark clothing. The camera brightens the scene.
- Next frame: mostly bright sky. The camera darkens the scene.
This is how you end up with inconsistent exposures in a sequence.
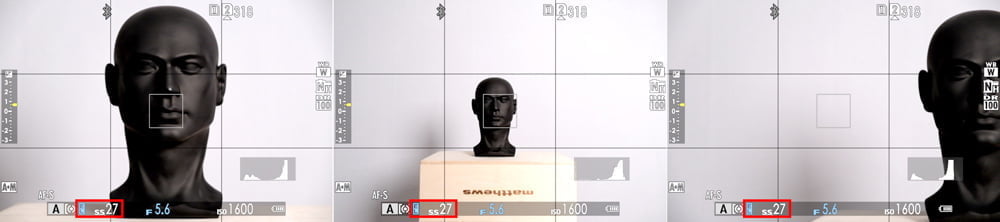
AEL locks the exposure settings in place so every frame matches until you release the lock.
Before mirrorless cameras, AEL was also used to meter off a known tone, lock that exposure, and then recompose. The technique still works today if you want precision, but mirrorless tools like live histograms make it less common.
How to Use Auto Exposure Lock
Every camera brand handles AEL a little differently. Your manual is always the most accurate reference, but here is what to expect and how to check what your camera is doing.
Using the Shutter Button to Lock Exposure
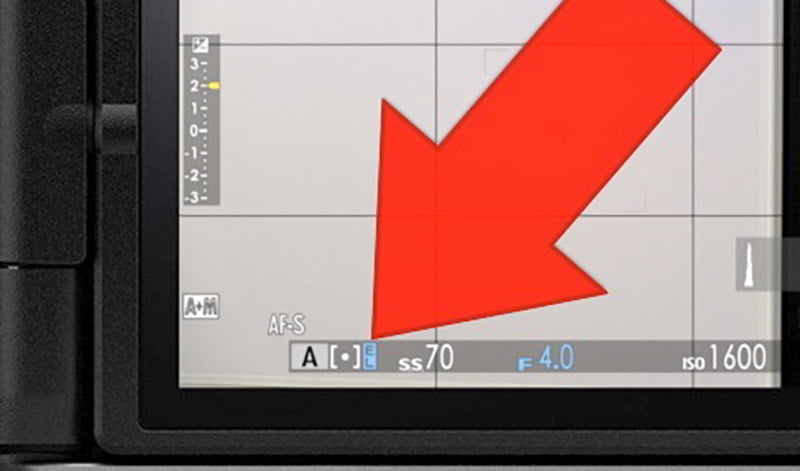
Many cameras lock exposure when you press the shutter halfway.
On Fujifilm, this is enabled by default. Compose your frame, press halfway, and look for “EL” in the display. Exposure stays locked until you fully release the button.
On Nikon, the default behavior is different. The shutter half-press does not lock exposure unless you enable it.
To find out what your own camera does:
- Press the shutter halfway
- Look for EL, AE-L, or an asterisk
- If nothing shows, exposure is not locking
You can usually customize this.
Fujifilm:
Go to Button/Dial Setting and look for Shutter AE. You can choose whether the shutter locks exposure in AF-S, AF-C, or both.

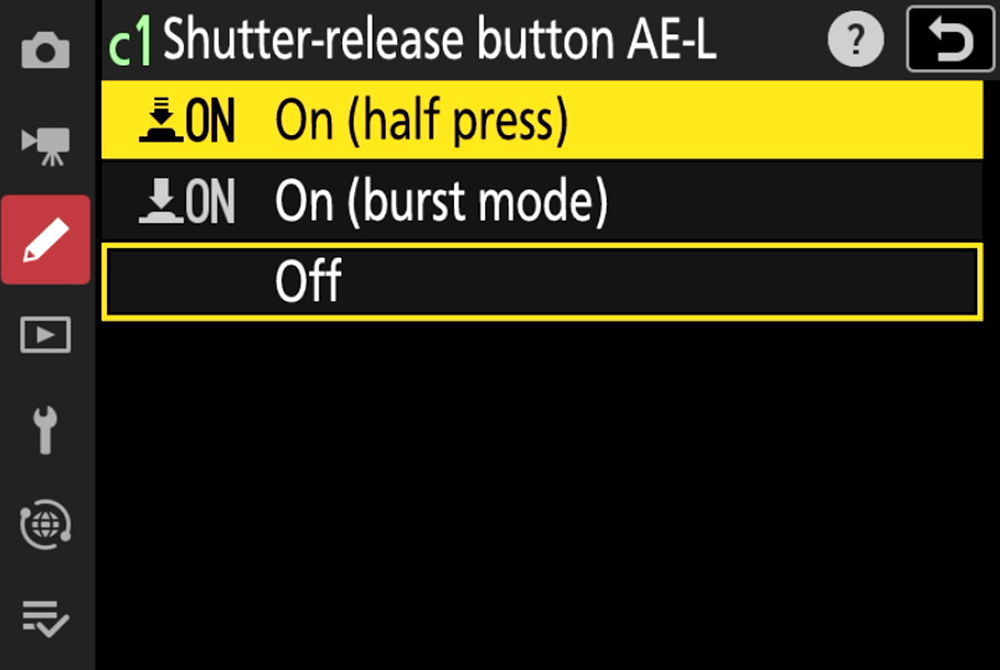
Nikon:
Go to Custom Setting c1. Options include On (half press), On (burst mode), and Off.
Many cameras will lock the exposure when you press the shutter halfway.
Using the AE Lock Button
Every camera also includes a dedicated AE Lock button. It may be labeled AEL, AE-L, an asterisk, or (on many Nikons) mapped to the center press of the sub-selector joystick.
Two behaviors are common:
- Hold: Exposure stays locked only while the button is held.
- Toggle: Press once to lock, press again to unlock.
Check your display. Tap the button, release, and see whether the symbol stays on.
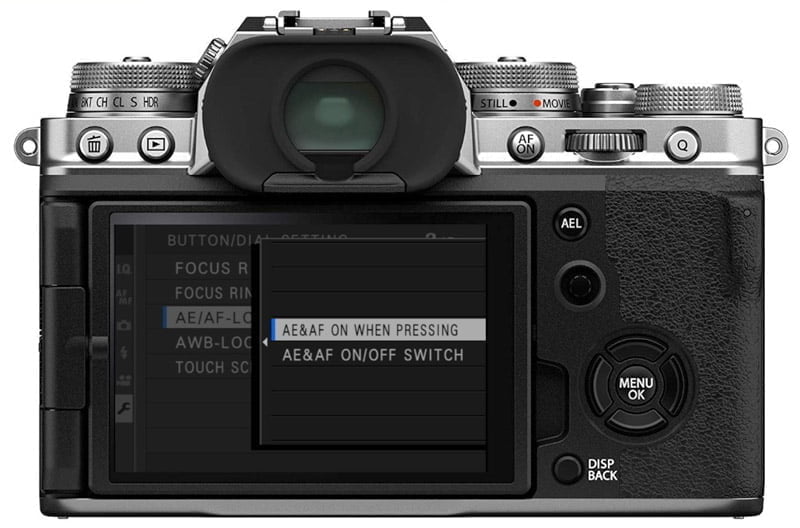
Fujifilm setup
- Hold DISP/BACK to reach the Fn Setting screen and assign AE LOCK.
- In Button/Dial Setting, find AE/AF-LOCK MODE and choose Pressing or On/Off Switch.
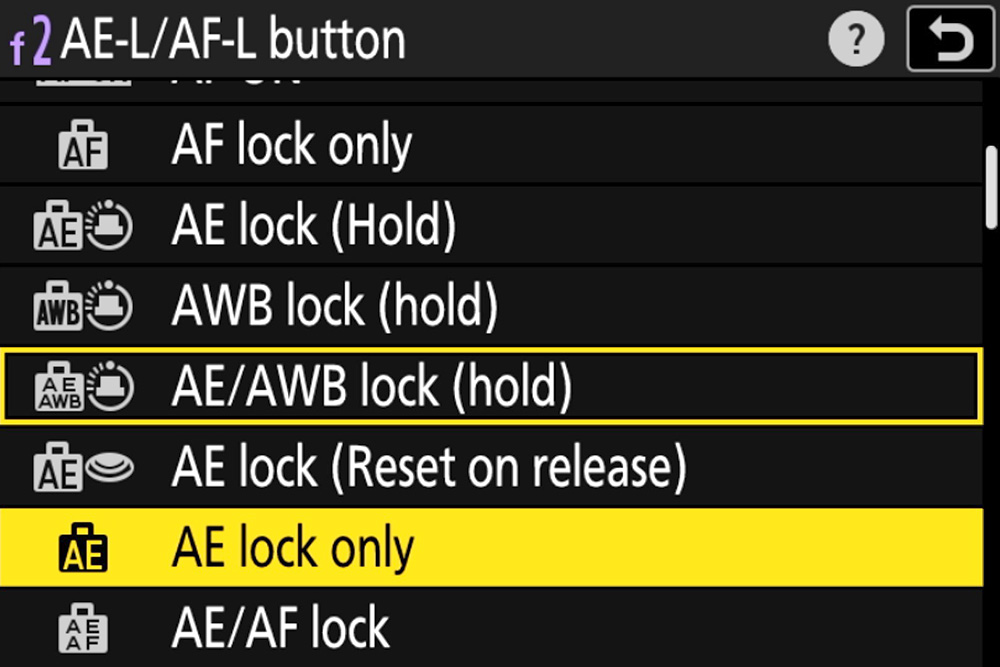
Nikon setup
- Go to Custom Setting f2 and assign your chosen AE Lock function.
- Available behaviors include AE Lock (Hold), AE Lock (Reset on release), or AE Lock Only.
When to Use Auto Exposure Lock
Use AEL when the exposure looks correct, and you want that same exposure across multiple compositions.
This might be:
- A portrait sequence where background tones shift
- A street scene where you need consistency from frame to frame
- A panorama where you do not want the brightness to wander
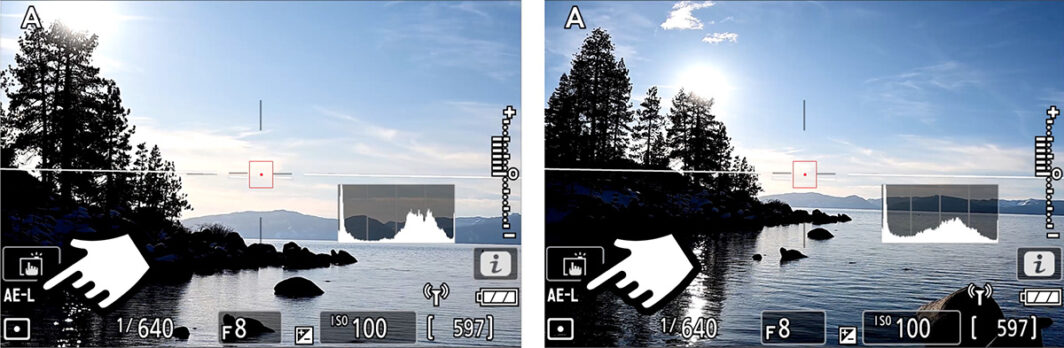
- A backlit subject where you want to meter once, lock, and shoot freely
Dial in exposure first using Exposure Compensation or your histogram. Once the frame looks the way you want, lock it. Now you can recompose as much as you want without the meter reacting to new tones.
One note about shutter half-press: if you rely on it for exposure lock, you may limit your ability to re-focus as you recompose. This is the main advantage of using the dedicated AE Lock button instead.
Final Thoughts
Auto Exposure Lock is one of the oldest exposure tools in digital photography. It still matters because it gives you consistency and control in situations where the meter wants to shift from one frame to the next.
Modern cameras offer many tools that can replace the old metering tricks, but AEL is still worth knowing. You will not need it every day, but in the right situation, it will keep your exposures clean and predictable.
Questions or comments? Please let us know below!
Mark Fernandes
Friday 4th of August 2023
Great article! Very clearly written. Thanks so much.