Disclosure: This post may contain affiliate links. I earn a small commission of product sales to keep this website going.
My most recent nonprofit project was with the Tahoe Rim Trail Association (TRTA) this past summer (2024).
What’s a nonprofit photography project? Well, I recently hosted a webinar on the subject, and you can watch the video/read the article here.
I spent over a week in the backcountry on a couple of different projects for the TRTA, and here’s a rundown of the last trip.
Quick trip summary
The “mission” of this trip was to spend four days in Desolation Wilderness, near Lake Tahoe, to rehab a section of the Tahoe Rim Trail between Dicks Lake and Dicks Pass. The Tahoe Rim Trail is a 165-mile scenic trail circumnavigating the Lake Tahoe basin.
This nine-person group consisted of both paid trail workers and public volunteers. It’s one of TRTA’s many “work camps” they host over the summer, where volunteers can spend time in this beautiful backcountry while making improvements to the trail.

Starting at the Bayview Trailhead, we backpacked 4.5 miles to our “base camp” at Dicks Lake, with a total elevation gain of 2,000′ (ending at 8,500′). We’d spend three nights there, hiking every morning to different sections of the trail that needed work.

My job was to obtain media for the TRTA, both video and photo. They’ll use these photos and videos on social media, their website, advertisements, newsletters, and their annual report.
Part of me felt guilty “watching” them perform some physically demanding work while all I did was take pictures, but I did put on some gloves the final day and move some rock 🙂
Gear packing
I learned some hard lessons during my first trip with the TRTA this summer, documenting one of their backcountry youth camps.
I wanted to be ready for everything while avoiding lens changes in this dusty environment, so I took two Nikon Zf camera bodies and three lenses. The 24-70mm f/2.8 – my favorite general lens – was on one camera body, and the 70-200mm f/2.8 on the other camera body, ready to swap out with the 14-24mm f/2.8 as needed.
This proved to be overkill, especially when backpacking at high altitude and in steep terrain. My Boy Scout training always wants me to be prepared, but this isn’t always practical.
I really pared down for this four-day trip, instead bringing just one Nikon Zf with 24-120mm f/4 attached and the 14-24mm f/4 in a pouch. This took the weight down from 8.25 lbs to 4.5 lbs.
I love backpacking light (as far as personal gear is concerned), and this allows me to carry more photographic gear if needed. Once I followed my own lightweight photography rules and figured out what I’d really use, I needed a way to get it up into the backcountry.
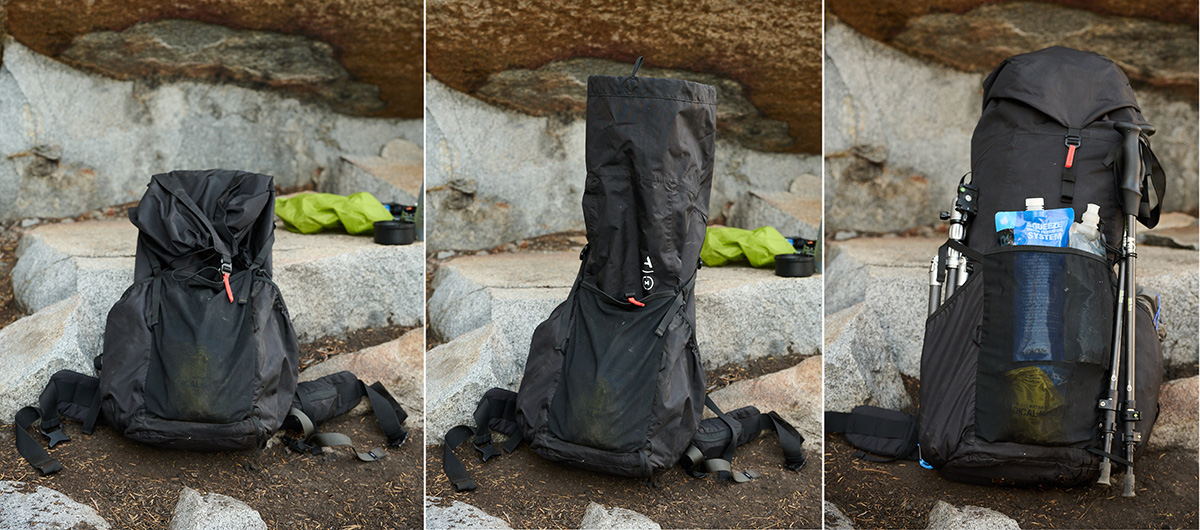
Moment Strohl Mountain Light 45L Backpack
I’ve had the Moment Strohl Mountain Light photographer’s backpack for years but never used it until now. It’s a 45L pack, enough for what I’d need, and designed with photographers in mind. It’s incredibly light at 2.5 lbs, comparable to similar-sized ultralight packs. A built-in padded compartment at the bottom holds a mirrorless camera, and you can also purchase a chest pouch to carry your camera there.
This isn’t intended to be a full review of the Mountain Light backpack (maybe I’ll get that next summer), but here are some takeaways:
- Overall, it’s a great ultralight pack with excellent organizational capability and configuration options, with various straps, loops, pockets, and attachment points.
- The camera insert is best for accessories or small cameras. Specs claim it can hold a Canon 5D and four lenses; I have no idea where this came from.
- The optional chest loader pouch also won’t fit a full-frame mirrorless with 24-70 f/2.8. It’s best for APS-C or smaller.
- The padded hip belt is equipped with straps that make it easy to attach camera/lens pouches like those made from Think Tank Photo or camera capture clips.
- Despite its light weight, the pack seems to be rugged and constructed very well.
- Contrary to what other reviewers have written, I didn’t have any problems with the top removable “brain” pouch randomly coming off or with the bottom camera compartment digging into my back.
Big picture, however, this isn’t a pack designed to carry a lot of weight. I couldn’t find any “max load” specifications, but similar packs have limits of 30 lbs or so. The lightweight design can’t comfortably hold larger loads.
This would not be my first choice for a weeklong backpacking trip of more than a couple miles. Your back and shoulders will pay the price.
Final configuration
I used the Shimoda Designs Top Loader to carry the camera on my chest for fast access since the Moment top loader was too small. Instead of clipping it perfectly right-side up and symmetrical like most chest mounts, I mounted it in a hybrid sling style thanks to Ian’s recommendation. A carabiner seemed more practical for the shoulder strap connection than threading the shoulder strap through the D-ring, as shown in the video. The top loader held my Zf with 24-120mm f/4, lens cleaning accessories, and cell phone.
A Think Tank Lens Changer 50 secured comfortably on the backpack hip belt, holding the 14-24mm f/2.8, ready to swap out if I needed a wider field of view than what the 24-120mm could provide.
These two pouches – a chest mount top loader holding my camera with primary lens and the hip belt pouch holding an extra lens – adequately protected my gear while providing quick access to photos while on the trail.
On location
What about doing photo and video during the trail work? I needed to be nimble, quickly moving up and down the trail to capture the different work locations. A slimmed-down configuration of the backpack worked the first day, but I wanted to be even slimmer for subsequent days.
The Shimoda Designs Top Loader has a large loop on the back, where I threaded the Think Tank Thin Skin belt. I also used the shoulder strap that comes with the Top Loader to ensure the belt wouldn’t fall down from the weight of the camera. This belt has multiple loops where I also attached a case for the NiSi Variable ND kit and step-up ring, which I could quickly affix to my lens for video. There was also plenty of room for the Lens Changer with my 14-24mm and another pouch to hold my water.
Thanks to Jonathan for the candid photo:
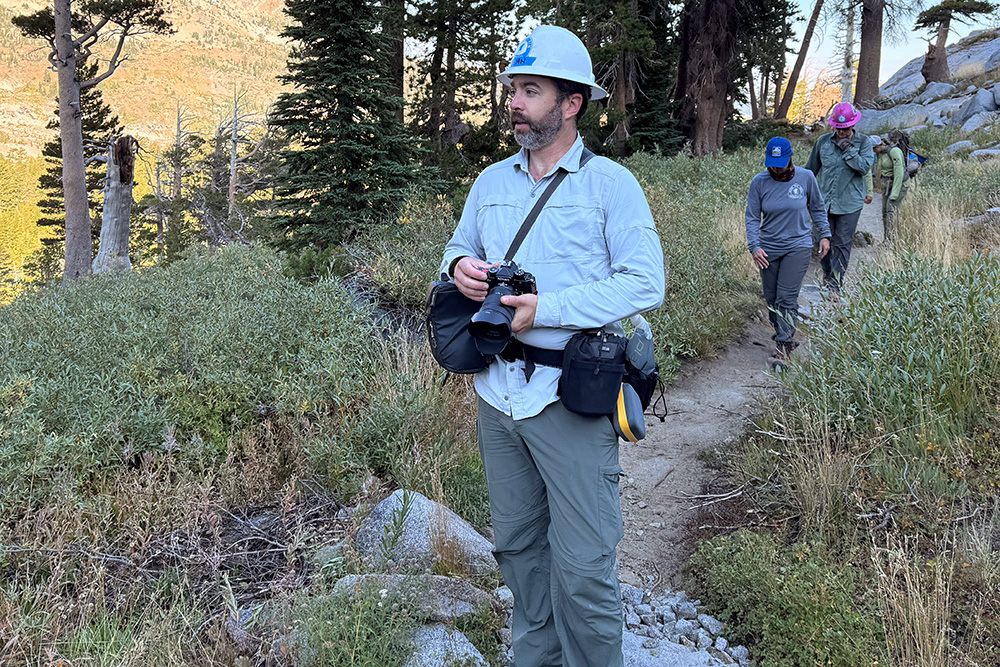
This setup was quite comfortable for the remaining two full days and allowed me to maneuver and get what I needed, especially in some tight spaces.
Work of the TRTA
Now what did this trail crew actually do?
They focused on improving the trail for everyone, to increase both the safety and comfort of day hikers to PCT thru-hikers on this section of the trail. Part of the Tahoe Rim Trail coincides with the Pacific Crest Trail, and the TRTA is responsible for the maintenance of that part of the PCT.
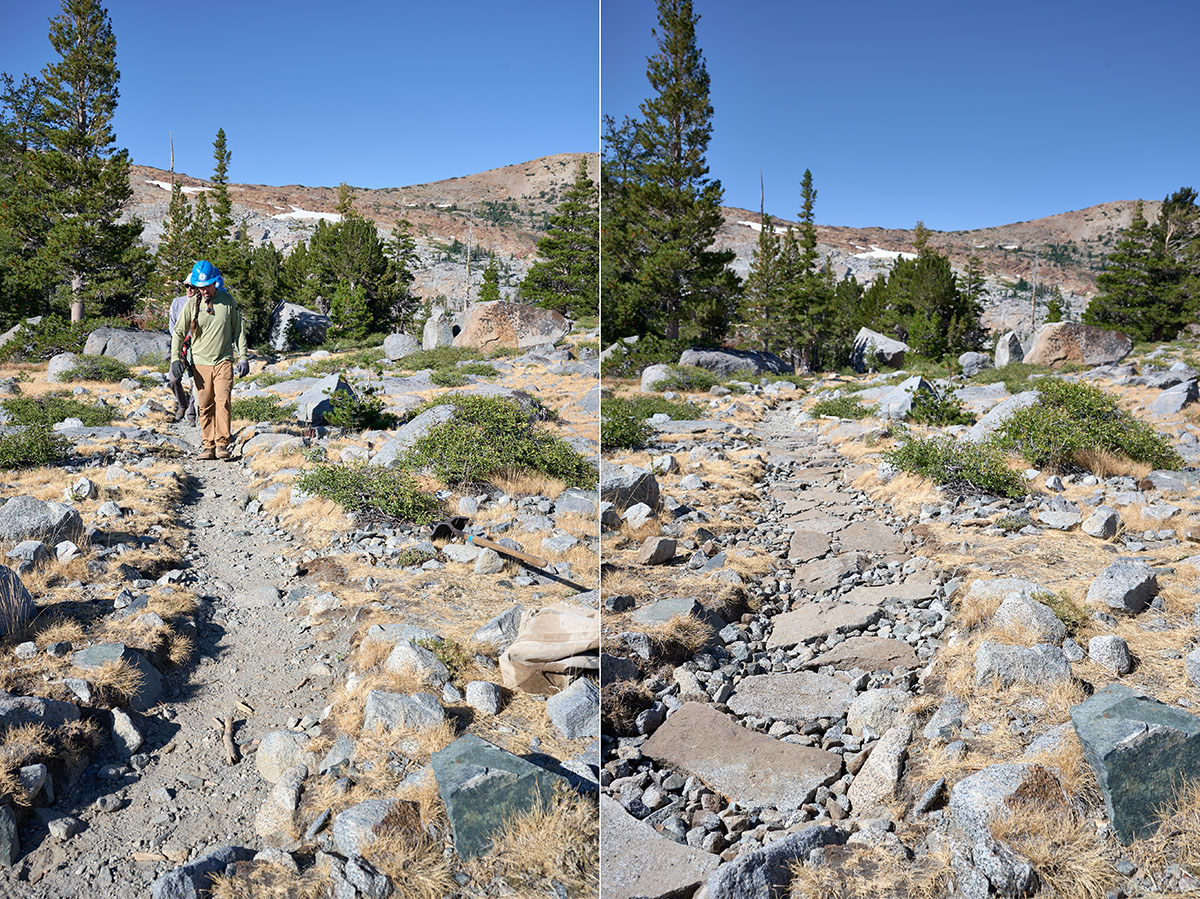
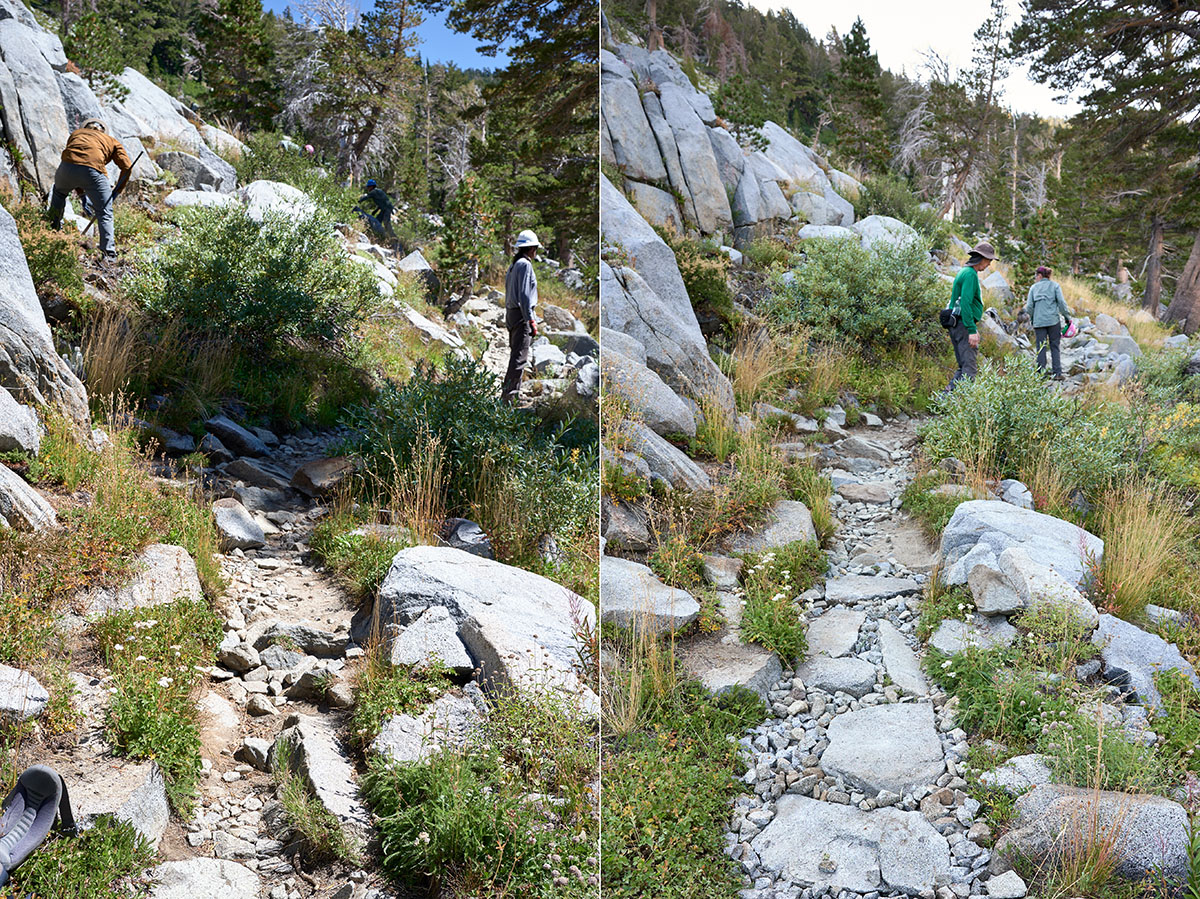
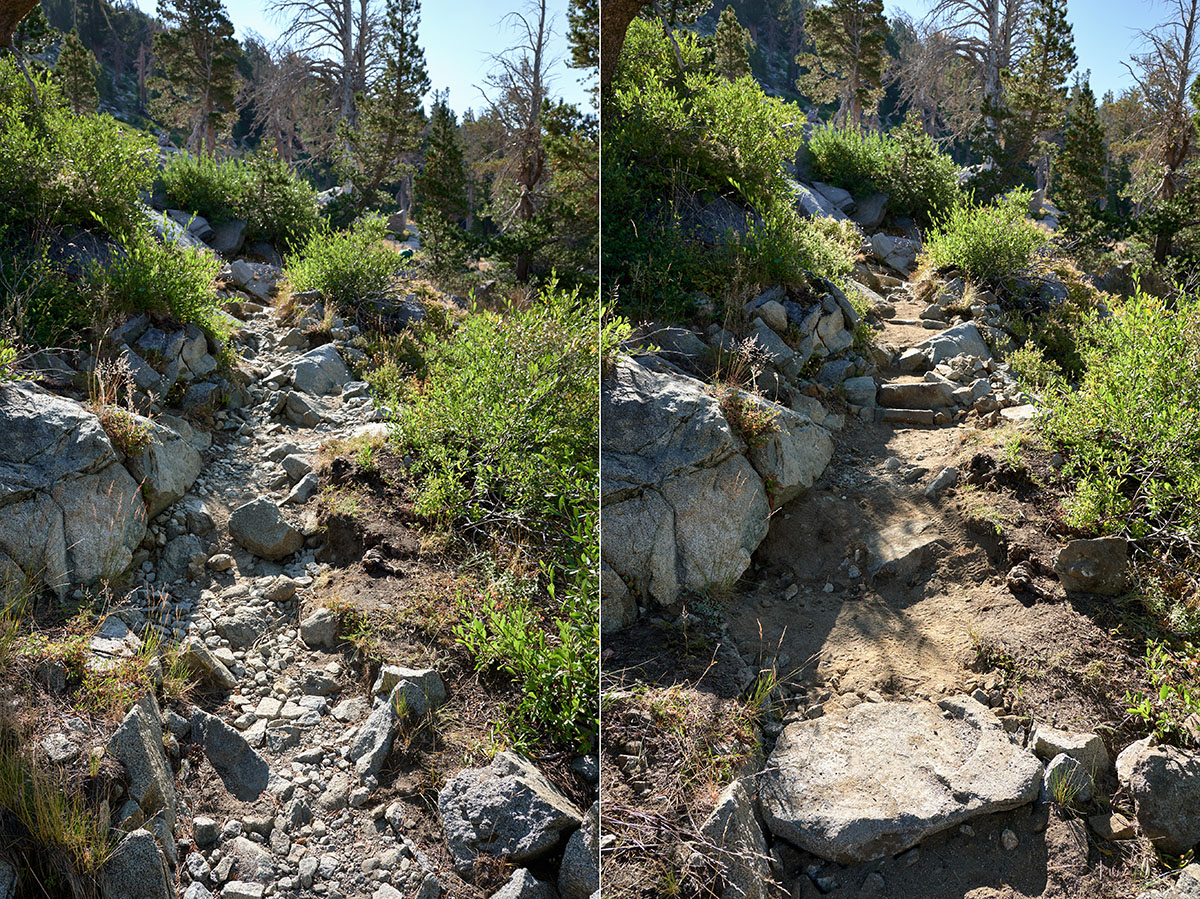
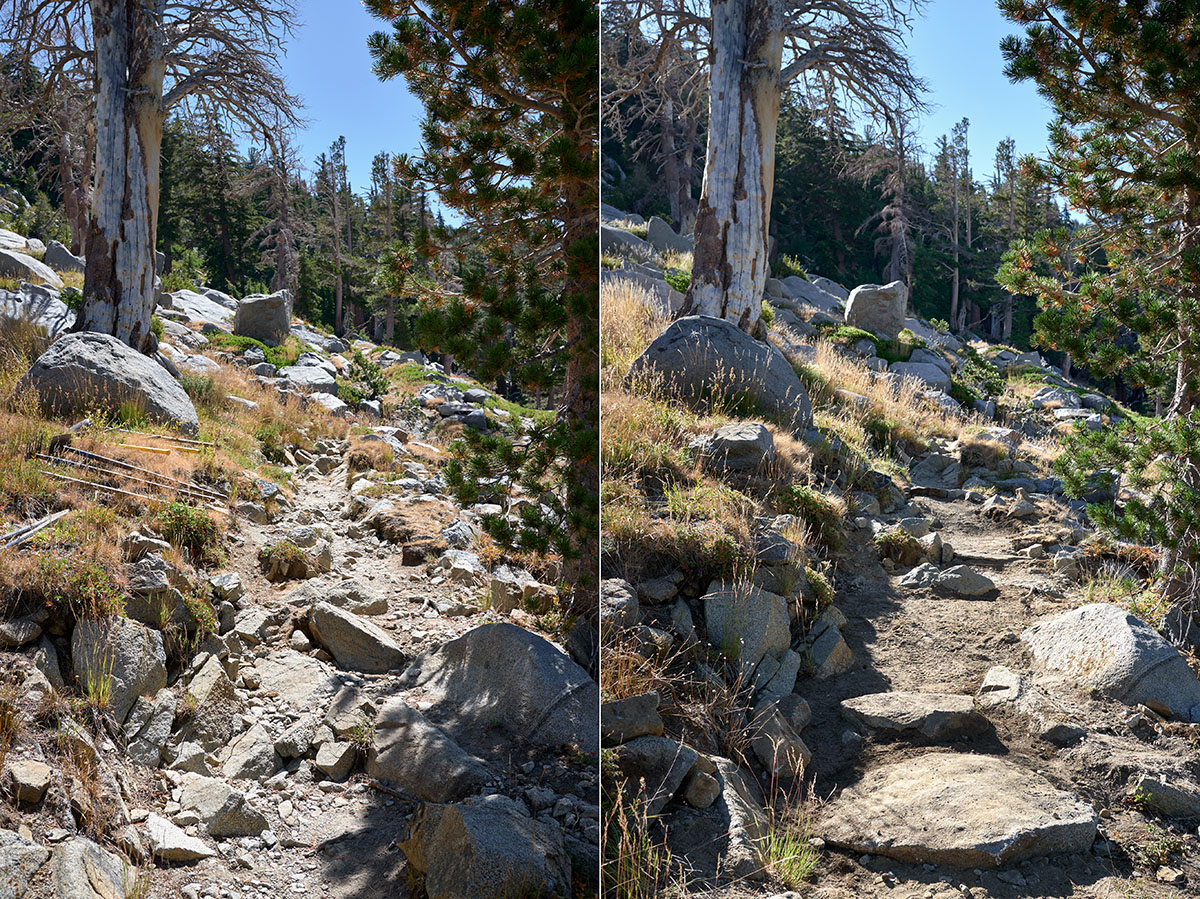
The crews removed rocks that could be tripping hazards, “armored” sections of the trail vulnerable to erosion, removed “braided” trail or parallel trail that hikers had formed due to the main trail eroding, and constructed drainages to prevent further erosion.
All of this was completed through the use of tools staged at Dicks Lake for the past decade, which allowed them to dig out rocks, pry boulders, and crush granite that could be used to fill in the trail. There’s plenty of granite in this section of the trail that was used to create stepping stones.
Rather than going on with words, here are some photos showing their work (before & after photos at the end):