Disclosure: This post may contain affiliate links. I earn a small commission of product sales to keep this website going.
How have I not written about the photography scavenger hunt yet?!?!
I’ve written about giving yourself photography assignments and treating your memory cards like film. This little idea is a great addition.
I had an in-person lesson yesterday and wanted to help my student see things for herself. She wanted to make her photos stand out more, to be less like snapshots. The scavenger hunt is a great way to do this, and it’s fun!
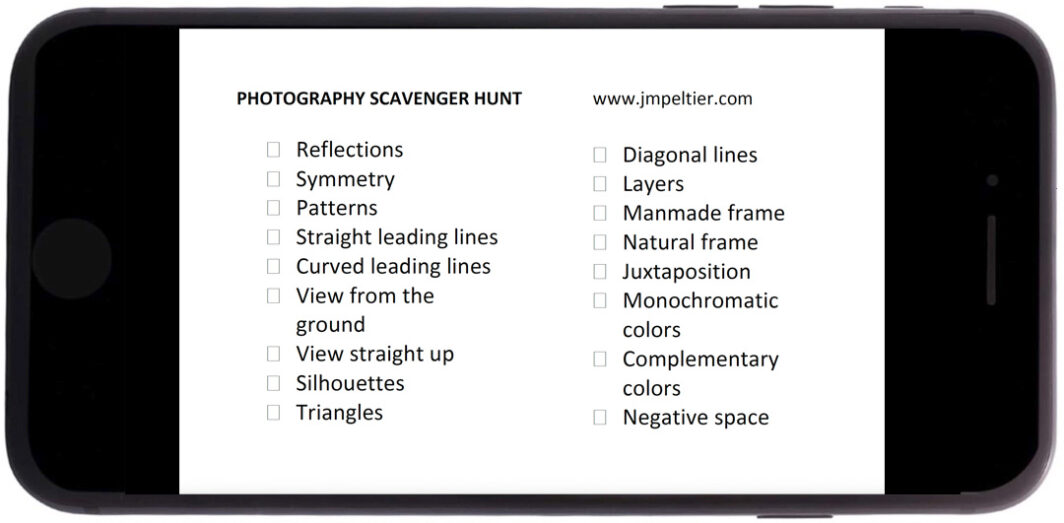
I’ll include a link at the end so you can download the card I’ve since updated to work for everyone from iPhone photographers to those using big, fancy, expensive camera as. These concepts can be applied wherever you are, whether you’re a landscape photographer or a street photographer.
And you can, of course, take the concept and customize it to include more specific items to the area you’re in.
Watch the YouTube video:
Why do a Photography Scavenger Hunt?
I was first introduced to the concept of a photography scavenger hunt on a teaching trip to Morocco with The Giving Lens a few years back.
We gave the kids a list of things to find while out on a photo walk. They had to come up with creative ways to make photographs of these things. The list included items like the national flag, a bicycle, a pink flower, etc.
One of our goals was to get the kids excited about photography, and less likely to find hobbies that might get them in trouble.
But our other goal was to give them a fun way to think about composition and creative photography in a manner that wouldn’t make them lose interest within two minutes.
Learn to see
There are undoubtedly certain compositional tricks that you can use to improve your photography – including leading lines, shapes, symmetry, complimentary colors, and so forth.
But how do you actually learn to see these things so that their use becomes more natural in your photography?
The scavenger hunt is the answer.
Forcing yourself to “look” for certain things helps you “see” if that makes sense. If you go out and intentionally hunt for curved leading lines, for example, their use will become second nature to you.

How the Photography Scavenger Hunt Works
When you go out on a photo walk with your scavenger hunt list, the idea is not to finish it as quickly as possible. It’s not a competition. It’s a creative exercise, and it requires time.
So you’ll see things on my included list like “natural frame.” Don’t just take a picture of four branches that form a square and call it a natural frame. Put something in the frame. Include some other concepts within the frame, like symmetry or patterns. Be creative with it.

About the items in the attached PDF
The attached PDF is a pretty good starting point; it’ll teach you some basic compositional and thematic concepts that will improve your photography.
If you want to print it, it’s made for a 4″x6″ index card. But you can also keep it on your phone for reference.
Feel free to take this idea and run with it, creating your own.
Here’s a quick explanation of what each item is, in case they’re not immediately clear:
- Reflections: hopefully obvious. Photograph a reflection of something in glass, water, etc.
- Symmetry: a photo that looks like one half (top/bottom or left/right) is a mirror image.
- Patterns: anything that repeats.
- Straight leading lines: two straight lines that enter from any side of the frame and converge towards the middle.
- Curved leading lines: ditto but with curved lines.
- View from the ground: a photo from on or near the ground, offering a perspective we normally don’t see.
- View straight up: a photo looking skyward.
- Silhouette: hopefully obvious. An object/person silhouetted against a bright background.
- Triangles: any physical triangular shape, or, more fun, connect any three prominent objects to form a triangle.
- Diagonal lines: use of strong diagonals throughout the frame.
- Layers: use of prominent objects in a distinct foreground, mid-ground, and background.
- Manmade frame: a manmade object used to “frame” a subject in a photo.
- Natural frame: a natural object used to “frame” a subject in the photo.
- Juxtaposition: a contrast of ideas, like a dog pooping in a park next to a “no dogs” sign.
- Monochromatic colors: a photo dominated by similar shades of one color.
- Complementary colors: a photo dominated by colors opposite on the color wheel.
- Negative space: an object surrounded by “nothingness,” either solid colors or tones, to emphasize that object.
You can check out the Basics of Light, Composition, and Color course (20% off with “blog20”) for further details and exercises contained within this photography scavenger hunt.
Download the scavenger hunt:
