Disclosure: This post may contain affiliate links. I earn a small commission of product sales to keep this website going.
Getting your Nikon Zf set up? A lot of the default settings are just fine if you never touch them. There are, however, some camera defaults that I change first, and I want to share those with you, along with my reasons for doing so.
This article will cover the Nikon Zf settings that I consider the most important, the “base” settings that you’ll likely only have to set once or rarely change. Any menu settings not mentioned are either fine leaving set to the defaults or are situation-dependent based on what you’re photographing.
If you have any questions about settings not mentioned here or want further details on why I set something, please let me know in the comments.
Or watch the video:
Photo Shooting Menu
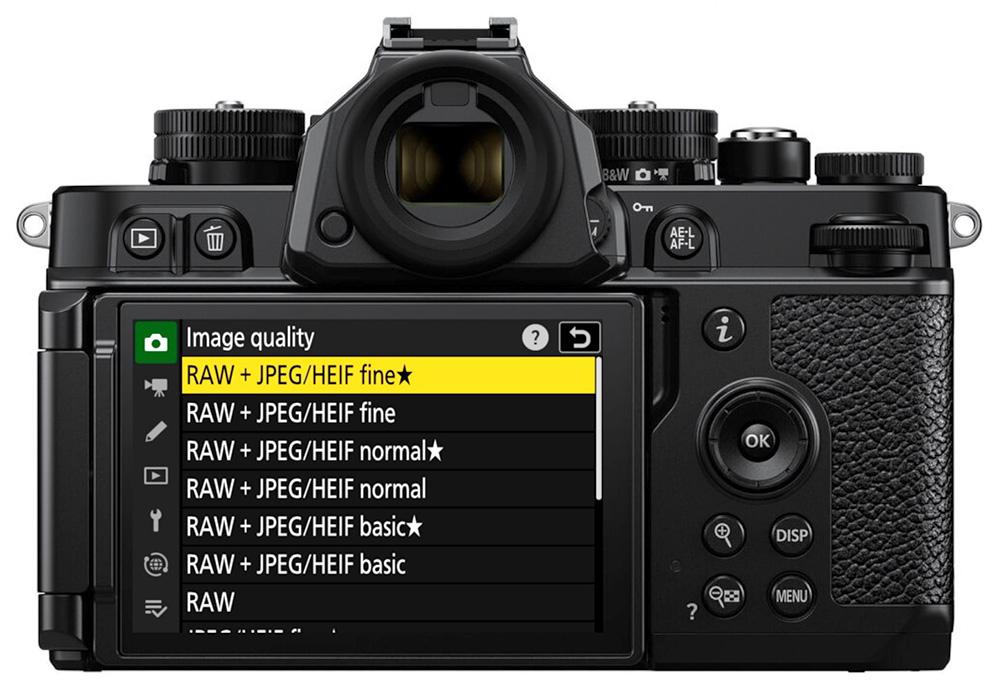
Image Quality. This is set to JPEG Normal as a default, giving you a medium-quality JPEG file for the final image. If you want the RAW file, too, ensure RAW is set. Even if you only want the JPEG, I’d recommend choosing Fine for the quality.
RAW Recording. High Efficiency*, the default setting, uses a “lossy” compression to downsize the RAW file. If you’re recording the RAW file because you want all the RAW data, set Lossless Compression for the highest quality. Will you notice the difference when viewing a photo fit to your screen? Probably not, but if you want all the data, choose Lossless.
Custom Setting Menu
This is where most of the Nikon Zf defaults that I change are.
In this menu, when you change something from the defaults, you’ll see an asterisk next to the submenu designation. For example, *a1 means it’s set to something other than the default; a1 means it’s set to the default.
a Focus
a5 Store Points by Orientation. Off, the default, means that your focus point will remain in the same absolute position on the screen when rotated between horizontal and vertical orientations. But that doesn’t make sense to me. If you’re photographing in a horizontal orientation, your focus point (and AF-area mode) are likely going to be different when in a vertical orientation. So set Focus Point and AF-area Mode so you can have unique focus points in all orientations.
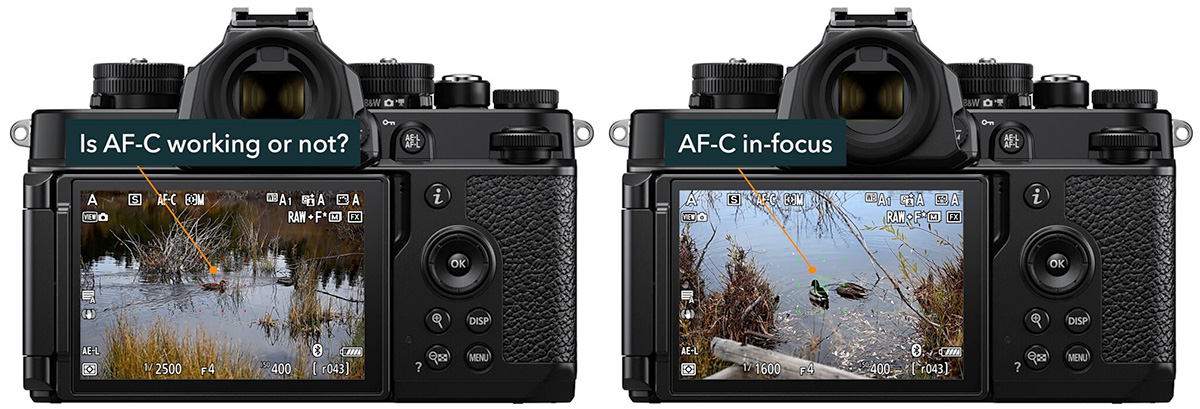
a10 Focus Point Display. The AF-C In-Focus Display submenu is set to Off, so the focus point will never change color when a lock is confirmed. But if you left Release set for a1 AF-C Priority Selection, you won’t really have an obvious visual indication of a focus lock in AF-C mode. So I turn this On so that the focus point turns green when the camera confirms a lock.
b Metering/Exposure
b3 Matrix Metering Face Detection. I used to have problems in the past with my exposure unexpectedly changing with this On in older cameras. It seems to have gotten a lot better in the Zf. But if you do encounter drastic exposure changes when face detection detects or drops a face, turn this Off.
d Shooting/Display
d6 Extended Shutter Speeds. It’s just nice to have this On so that you have the option of increasing your shutter speed to 15 minutes. Otherwise, you’re limited to 30 seconds.
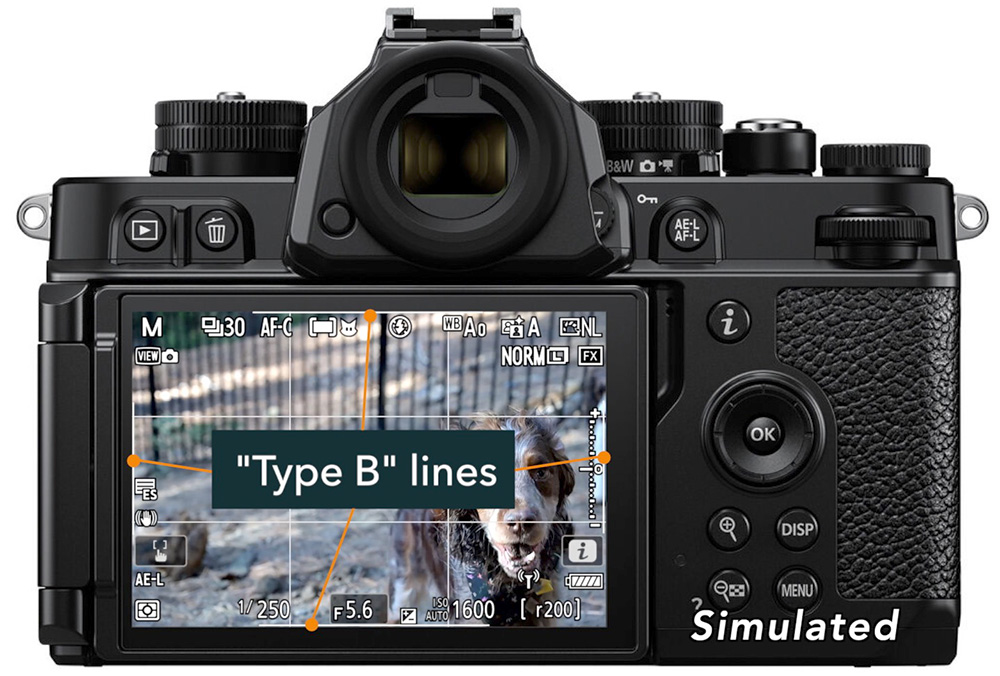
d13 Release Timing Indicator. The default is Type B, which means that little white lines appear around the display when doing a burst in C30 Release Mode. I can’t for the life of me make those out. They’re very difficult to see. I set Type A so the screen flickers instead.
Playback Menu
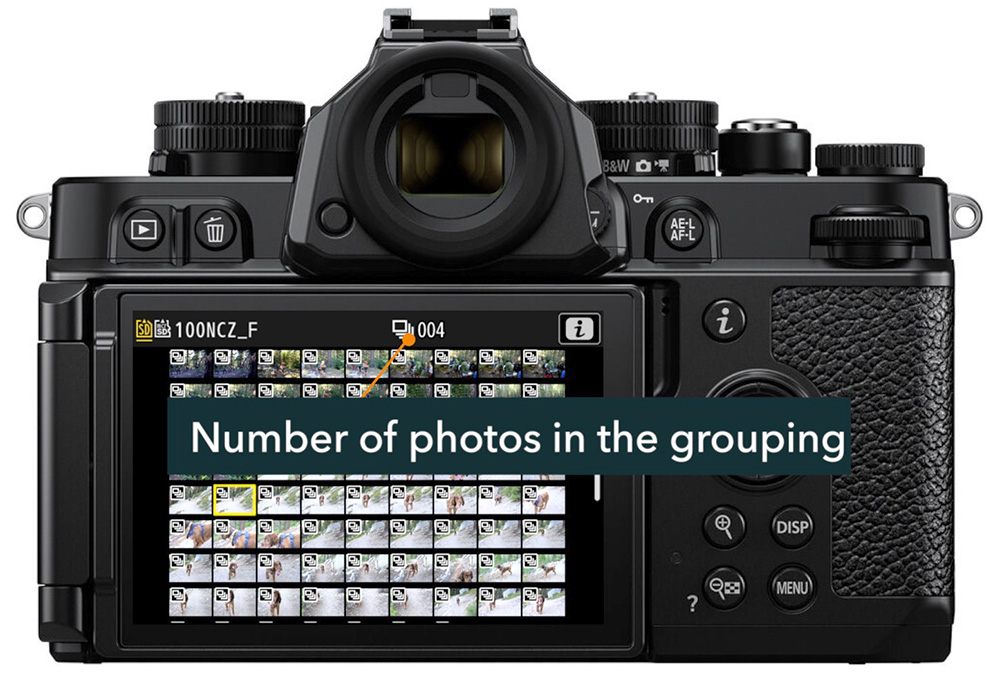
Series Playback > List Series as Single Thumbnails. You’ll probably want to turn this On if you do a lot of burst photography. You’ll see each burst as one thumbnail in the playback grid view. You can view each individual photo in that burst if you want to, but the grid view won’t be overwhelmed with every single photo in the burst.
After Delete. With the default setting, the camera will always advance to the next sequential photo after you delete a photo – even if you were scrolling “backwards,” and that always throws me off. Set this to Continue As Before so that, after deletion, the next photo in the direction you were scrolling is shown next.
Setup Menu
Save Focus Position. I like to turn this On so that, after cycling camera power, the lens will be at its last focus position. If left at the default, the focus distance will be reset to infinity each time power is cycled.
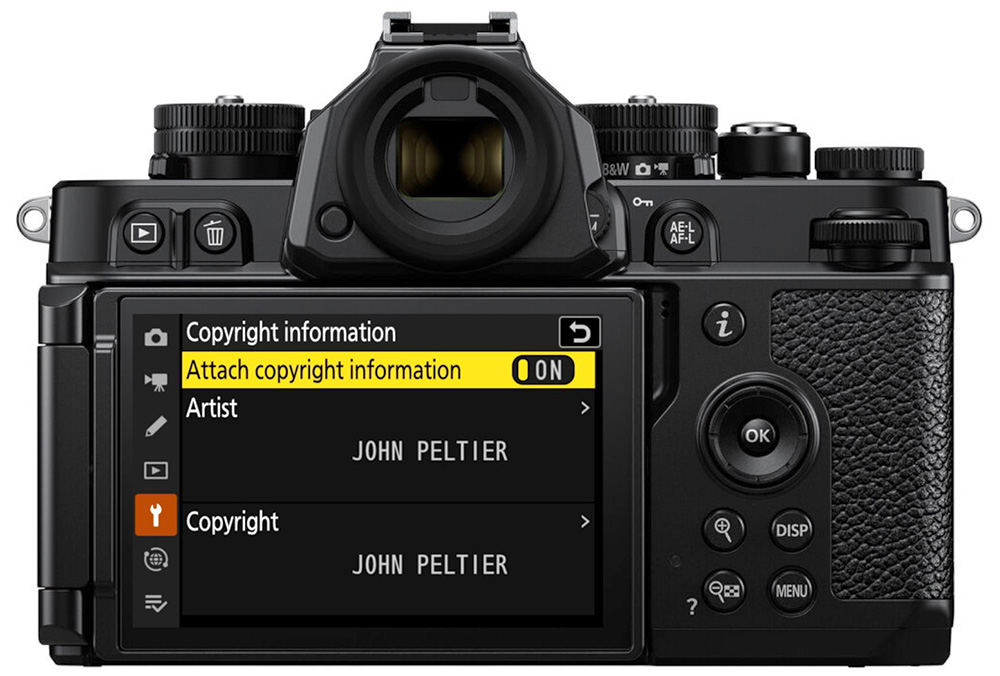
Copyright Info. Not so much a default you need to change, but be sure to add your name to the Artist and Copyright.
Energy Saving (Photo Mode). Turning this On will help you stretch that battery life just a little further. The screen refresh rate will slow down 15 seconds prior to the standby timer set in custom setting c3. Press any button to “wake it up.”
Slot Empty Release Lock. I like to set this to Release Locked because I’m an idiot and don’t always notice I don’t have a memory card installed. This inhibits shutter release until a card is inserted.
Network Menu
Connect to Smart Device > Select Pictures for Upload > Auto Select to Upload. All of your photos are tagged for transfer to SnapBridge by default. I find this rather annoying, I’d much rather manually choose which photos I want to transfer, so I set this Off.
Those are the Nikon Zf settings I’d recommend you change at a minimum when getting your camera set up.
If you want to learn more about setting up your camera, check out the Nikon Zf Tutorial Course and use the code “blog20” for 20% off. This course covers all of the menu settings, with demonstrations. It also goes over the focus and exposure tools in the Nikon Zf, retouching your photos, and customizing your camera.
Have any other questions or suggestions? Let us know below!