Disclosure: This post may contain affiliate links. I earn a small commission of product sales to keep this website going.
One of my gripes with Fujifilm’s app is that you couldn’t transfer RAW files to your smartphone or tablet. This means that if you wanted to import RAW files from your camera to Lightroom while on the go, you had to carry a portable SD card reader to connect to your device.
Well, that’s not a problem anymore. Newer cameras (X-Processor 5) now give you the ability to transfer RAW files directly from your camera to your smartphone with the latest firmware update and XApp version. This was pushed out in late April. These cameras are:
- X-H2/X-H2S
- X-T5
- X-T50
- X100VI
- X-S20
This feature is not available in GFX series cameras.
Curious how to manage RAW image transfer? Continue reading.
File Recording Setup
RAW or RAW+JPG
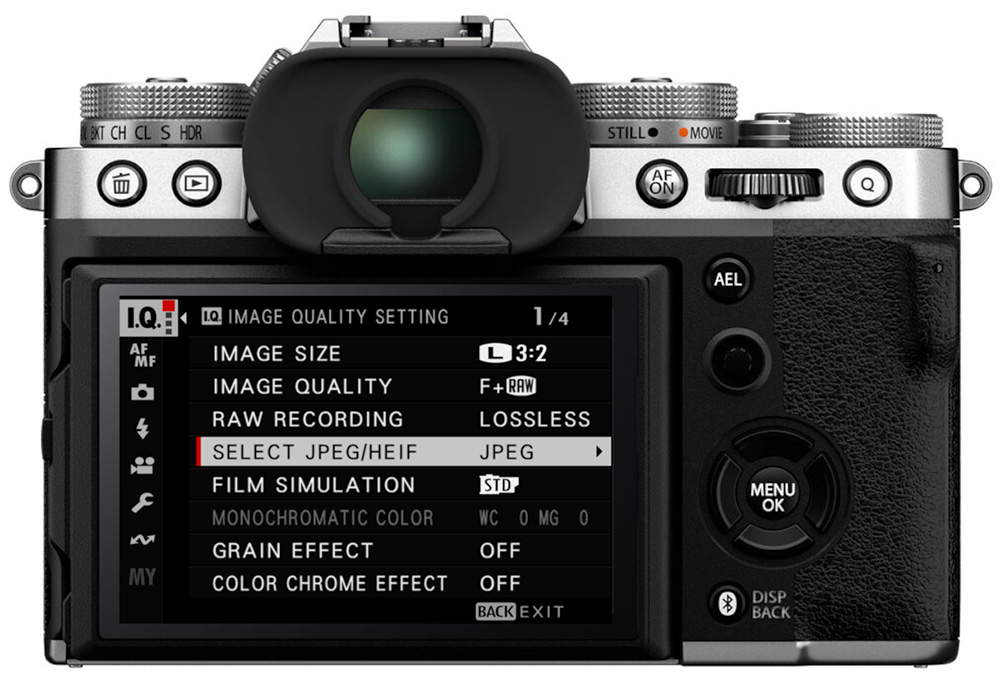
The file formats selected in the IMAGE QUALITY SETTING menu will be saved to your memory card(s) and will be available for transfer to XApp.
I’m a big fan of recording both the RAW and JPEG formats for reasons outlined here; you set whichever formats are best for your own workflow.
Choose either RAW only, JPEG only, or RAW and JPEG in the IMAGE QUALITY submenu.
In SELECT JPEG/HEIF – if you’re recording a processed file alongside your RAW files – I recommend choosing JPEG. HEIF isn’t quite compatible with all devices yet and may not be supported by yours.
All RAW formats in the RAW RECORDING submenu (Uncompressed, Lossless Compressed, or Compressed) are supported for transfer to XApp and compatible with Lightroom.
You may not be able to see the thumbnails until the image is opened in Lightroom. On some devices, the preview image can’t be extracted from Lossless Compressed or Compressed formats.
Which card to use?
The X-H2/H2S and X-T5 have dual card slots. If you’re recording both file formats, should you record JPEG to one and RAW to the other, or have the RAW/JPEG pairs on the same card?
Again, this is a choice you’ll have to make for your desired workflow. I outline a recommended RAW+JPEG workflow in this article.
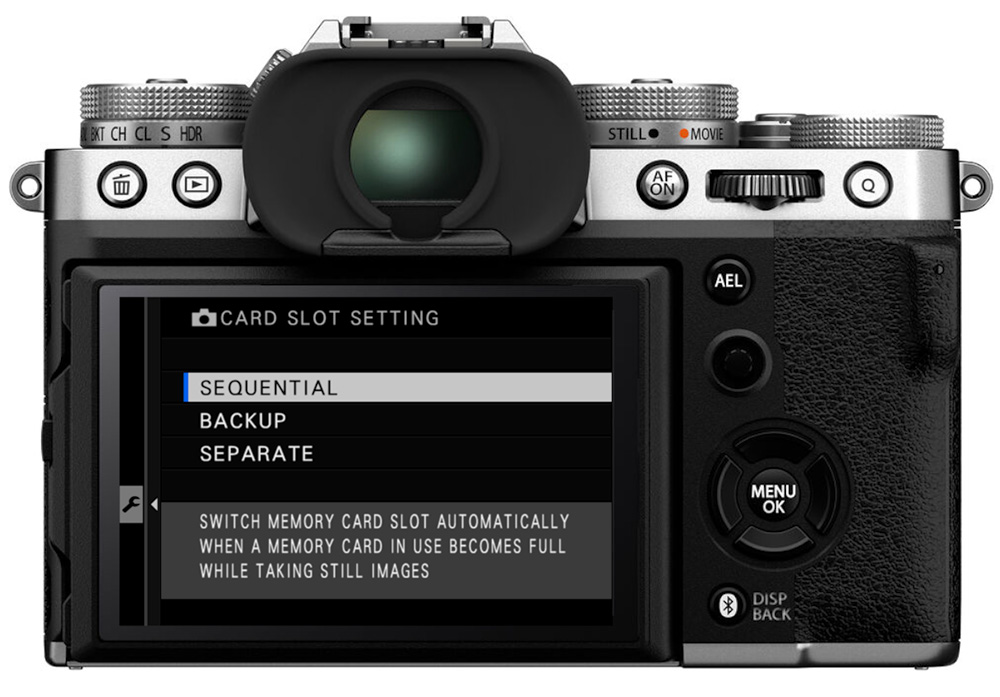
You’ll set these options in the SAVE DATA SET-UP menu under CARD SLOT SETTING. I use either Sequential or Backup depending on the job; I never use Separate but you’ll see how to manage that in the app next.
Transferring Files with XApp
You’ll need to connect your camera to XApp. The camera has a fairly good walkthrough and you can also read this article for more information about connecting to the app.
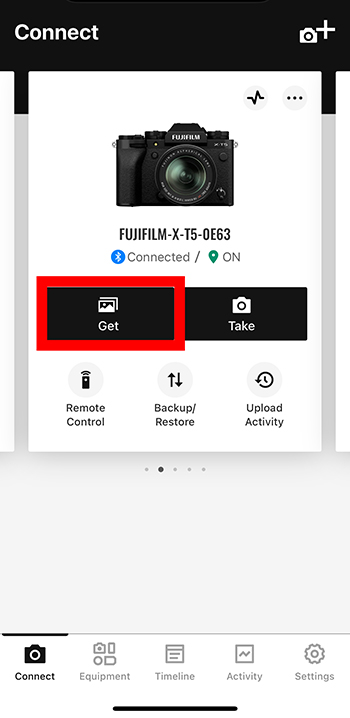
Tap “Get” on the screen for your connected camera and you’ll be taken to the thumbnail page.
Recording RAW and JPEG photos on separate cards
If you record RAW files to one card and JPEG files to the other (SEPARATE selected in CARD SLOT SETTING; X-H2/S & X-T5 only), be sure you’re downloading images off of the correct card.
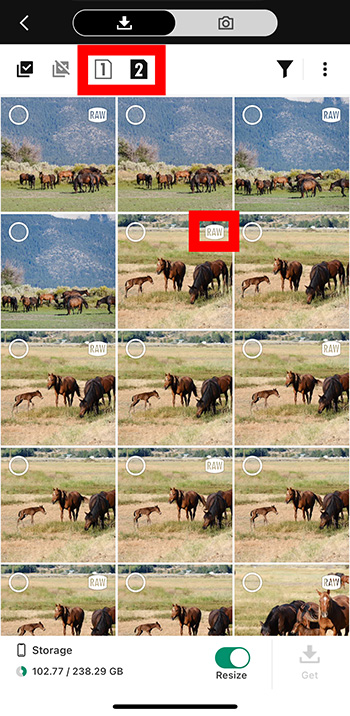
Tap the appropriate memory card selection (1 or 2) in the upper left of the app. RAW photos have the “RAW” icon on them, and photos without that icon are JPEGs.
So with this setup, you just choose the card with your desired file format (RAW or JPEG).
Using just one memory card
If you’re recording both file formats on one memory card, be aware of which files are which. As mentioned in the previous paragraphs, RAW files are indicated by the RAW icon. Its JPEG pair won’t have an icon on it.
Depending on which format you want to transfer, you can use the “Filter” icon in the upper right to show only RAW files or only JPEG files. Below, you’ll see that I want to see RAW files only.

Selecting & downloading
There are a few different ways to select the files you want to transfer:
- You can select individual photos by tapping on the circle in each photo; when selected, the circle will have a checkmark in it.
- Select all photos created on a certain date by tapping the circle next to that date. The circle will turn green when that date is selected.
- Select all displayed photos with the “Select All” icon in the upper-left. Deselect all with the icon next to that.
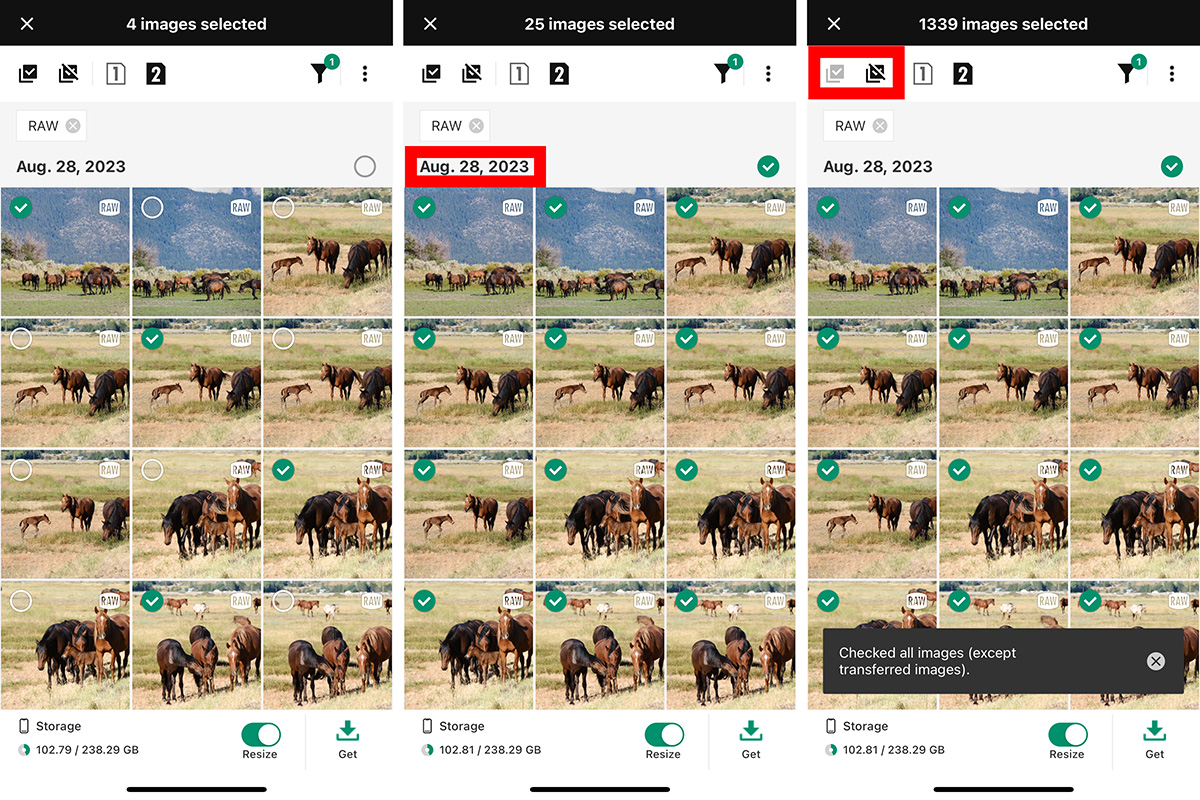
The top of the screen shows how many images are selected for transfer. Check it before starting the transfer—too many RAW files will take forever and deplete your batteries!
If you’re recording the JPEGs, I recommend enabling “Resize” at the bottom of the screen. This will downsize your images to 3MP social media-ready images. RAW files will not be resized even if this is enabled and only transferring RAW files.
Review your selection one more time and tap “Get” to start the transfer!
The selected photos (RAW and JPEG) will be downloaded to your camera roll. Remember what I mentioned earlier – Lossless Compressed and Compressed RAW files probably can’t have their preview images extracted, so the thumbnails will be blank.
From there, you can import them into Lightroom to start processing them without ever taking your memory card out of the camera!
Paolo
Friday 17th of January 2025
Thank you for the informative article. But why do the raw files look identical to the jpegs? Even jpegs using recipes. And another thing that puzzles me is that when I export both the raw and the corresponding jpegs file from to lightroom mobile from Xapp only one file appears?
John Peltier
Saturday 18th of January 2025
Every RAW file has an embedded preview file, essentially a low-res JPEG created using the Image Quality settings in use at the time the RAW file was captured, and that's what is rendered when you're previewing the files.