Disclosure: This post may contain affiliate links. I earn a small commission of product sales to keep this website going.
Oh boy, everyone’s favorite topic, accessories for your Fujifilm camera! This can get wild…
If you missed the first two parts of this series, you can catch up here:
- Building your Fujifilm Photography Kit Part 1: Camera Bodies
- Building your Fujifilm Photography Kit Part 2: Lenses
Now, obviously, I can’t mention every single accessory that’s compatible with Fujifilm cameras.
Like the first two parts in this series, I’m going to try to keep this at more of a practical level, determining how to set up your Fujifilm kit with the essentials, rather than tell you which specific products to buy (though I will certainly make recommendations).
So let’s get to it.
Storage & Transportation
Bags, bags, bags. Photographers seem to collect bags more than anything else. Me included!
But here’s my philosophy on bags, coming from the perspective of someone who travels a lot and has a large kit.
Just keep everything – your entire kit, if it fits – in one large backpack. One that can fit in an airplane’s overhead storage, if possible. It goes on the big trips with you and keeps everything together when you’re at home. I prefer the rugged Shimoda Action bags (X30 or X50) – they’re like real backpacks and don’t scream camera bag!
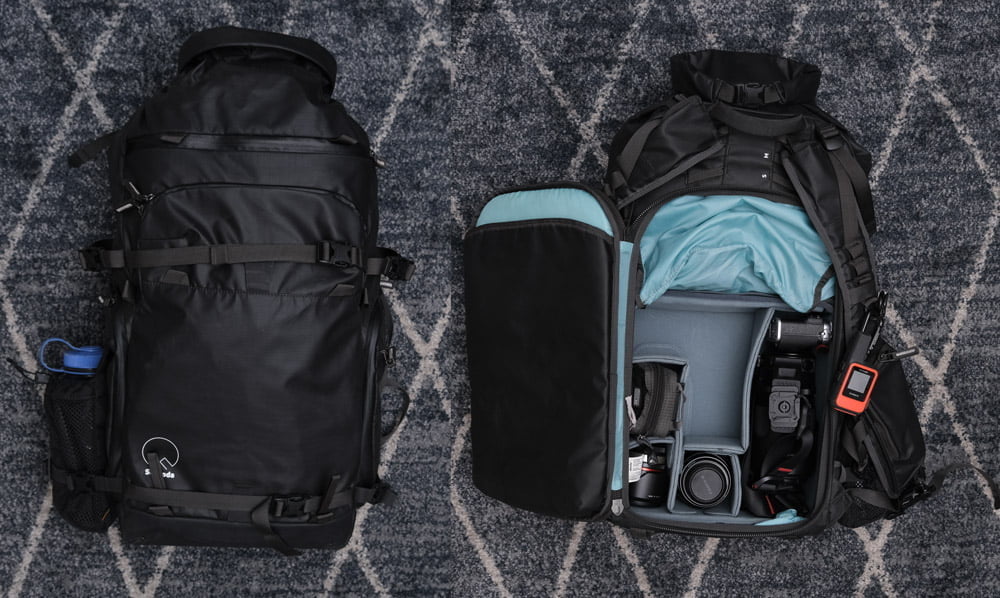
Then once you get to your destination, or even at home when you just want to go out with one camera and a lens or two, have another smaller bag to carry around. For this, I prefer Think Tank Photo’s Retrospective canvas shoulder bags (Retrospective 4, 5, or 7). These are also rugged bags that don’t scream camera bag!
I like shoulder bags – especially for the lighter Fujifilm cameras – because the camera is accessible. One thing that I’ve learned over the years is that if a camera isn’t accessible I’m not going to use it. Meaning if you’re walking around with your camera in a back-loading backpack, it’s more likely to stay there and not create photos.
If you only have a camera and lens and don’t care about getting a huge kit? A small basic shoulder-style bag works just fine. I can vouch for Think Tank Photo’s products; I’ve used dozens of them throughout the years.

I love Peak Design’s button system for carrying just the camera. The Slide Lite and Leash straps fix to your camera using secure, easy buttons to take the straps on and off as you see fit – no fiddling with Fujifilm’s awful strap connection system. They’re also compatible with wrist and hand straps. I’m all about functionality and ease of use.
The Modular System
I’m a huge fan of building a modular system, especially if you use more than one bag, for keeping track of all of your Fujifilm accessories.
Let’s say you’re going out for a quick shoot where you’re going to use one camera and one zoom lens. You also think you’re probably going to use flash, and you want to make sure you have your lens cleaning kit “just in case.”
You could go through all of your drawers, bags, etc, and make sure you grab all of those accessories and hope you don’t forget anything. Or you could just grab a small storage bag containing your flash kit and another one containing your cleaning kit.
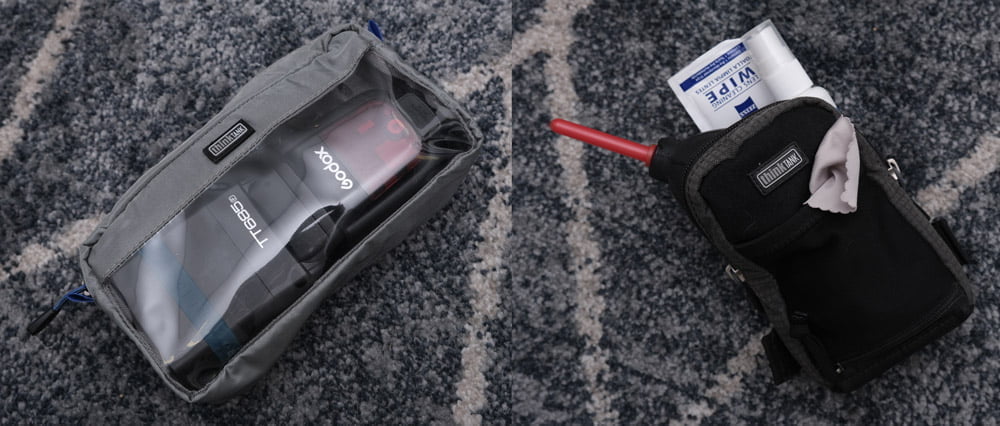
Here are some examples of modular kits I’ve made:
- Cleaning kit: blower, pre-moistened lens wipes, lens cleaning spray, lens cloths, brush in a small Think Tank pouch.
- Flash (basic): speedlight, wireless trigger, batteries, gels in a Think Tank Cable Management 10.
- Flash (advanced): speedlight, wireless portable flash, batteries, modifiers & gels in a Shimoda Medium Accessory Case.
- Portable editing: GNARBOX 2.0, charging cable, microSD adapter in an f-stop Small Accessory Pouch.
- Movie recording (basic): video light, shotgun microphone, headphones, adapters, cables in a Think Tank Cable Management 10.
- Movie recording (advanced): HDMI cables, lapel microphone, WhiBal card, ND filter, Atomos Ninja video monitor & battery in a Shimoda Small Accessory Case.
- Aerial photography (basic): Mavic Air2S, controller, batteries, charger, night strobe, filters, registration card, extra propellers, cleaning cloth in a Shimoda Medium Accessory Case.
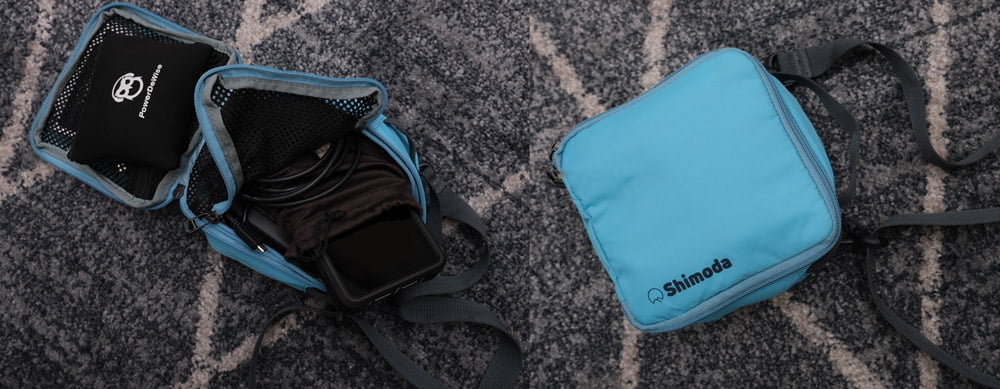
See how everything stays together?
If I just need a little speedlight I grab my basic flash bag. If I think I’m going to need more than one flash, or more powerful flash, I also grab my advanced flash bag. I’ll grab my basic aerial photography bag if I want to quickly grab some aerials. I’ll grab my portable editing bag if I’ll be on the road for more than a day. I move my cleaning kit around with whichever bag I’ll be carrying that day.
No need for hunting around for all required bits & pieces and trying to keep all of your Fujifilm accessories together. Just grab the bag.
This may not apply to many of you, but as you start expanding your kit and doing different types of projects, this system is a lifesaver. It never hurts to get in the habit early, even if it’s just having one little kit for your cleaning supplies so parts of it don’t go on walkabout.

Storage…for photos
Get a good SD card. Don’t skimp, but also don’t go crazy buying an expensive UHS-II SD card when your X-T30 only has a UHS-I slot.
This article contains all the details and specs to help you buy the proper memory card for your Fujifilm accessories kit.
Camera Care
Protection
If you only get one thing when you buy your camera, buy an LCD screen protector!
These little pieces of hardened plastic adhere to your LCD screen and are already sized for your Fujifilm camera. They help protect your screen from permanent damage while maintaining touchscreen funtionality.
Trust me, these screen protectors are invaluable. Especially if you ever sell your Fujifilm camera. Your buyers will appreciate a flawless screen. All of my screen protectors are beat to hell but the screens themselves are like new!
Cleaning
And as far as keeping your camera clean, I already mentioned the cleaning kit that I always take with me. This kit includes:
- A LensPen brush
- Zeiss Lens Cleaning Wipes
- Dust Blower
- Lens Cleaner Bottle & Microfiber Cloths
Even if I don’t take the whole kit, I at least always have the LensPen with me.
The small bottle of lens cleaner & cloths are nice to have when you travel because sometimes you just get things on your lens (like sea spray) that the Zeiss wipes can’t remove.
Power
One of the disadvantages of mirrorless cameras is that they suck the battery down much faster than DSLRs.
I’d recommend at least having one extra battery in your Fujifilm accessories kit; you can buy the cheap knock-offs from brands like Wasabi but in recent years I’ve just stuck with the more expensive Fujifilm battery packs. They seem to have a longer service life than the third-party brands.
Most (not all, but most) Fujifilm cameras can charge their batteries in-camera. I stopped carrying wall battery chargers with me years ago (and Fujifilm for the most part has stopped providing them), and instead just bring a USB cable and plug adapter. So always make sure you have the appropriate USB cable in your kit, and a way to get power to it.
If you’re on the road, you can charge your camera in your bag using a portable battery pack like the Ankers. You can read this older article about my Anker PowerCore 20100; I’ve had it for about four years now and it still works like new. Whenever you put your camera back in your bag just plug this in and you’ll have a fresh battery soon!
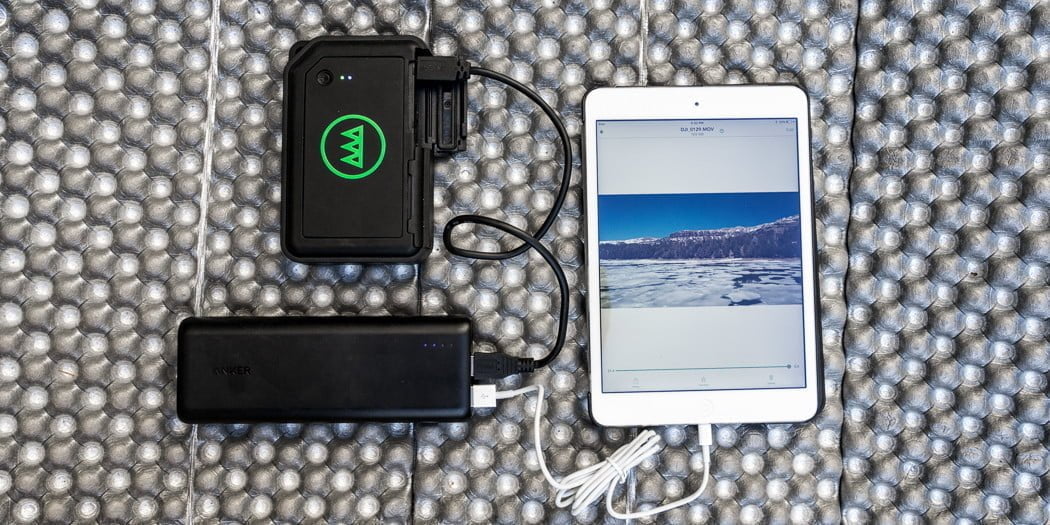
And for more battery-saving tips, you can read this article all about increasing your battery life in mirrorless cameras.
Tripods & Filters
These two things, like lighting, are also situation-dependent accessories for your Fujifilm. But I just want to take a second to address them.
Tripods
First of all, not every Fujifilm photographer needs a tripod. Don’t feel like you need to buy one. Tripods generally serve three purposes:
- Stability for longer exposures, especially when using longer focal lengths.
- Stability for “special” exposures, like focus stacking and HDR photography.
- Eliminate fatigue if holding your camera for a long time, waiting for certain moments in front of you.
So let’s talk about all three of these for us Fujifilm photographers.
- Absolutely valid. But if you have a stabilized lens and/or camera (like the X-T4, X-S10, X-H1), you can get sharp handheld pictures at fairly slow shutter speeds. Reference the photo below, taken at a half-second exposure time handheld. I was in a crowded space and did not want to set up a tripod here.
- Absolutely valid. But if you only do HDR photography “on occassion”, you can still get away with this handholding the camera.
- Also valid, but our cameras aren’t the heavy beasts that their predecessors were. Do you really need a tripod for that?

I don’t really like tripods because they seem to anchor me to one point. I like to move around to get different perspectives, to get different photos! Some photographers plop the camera on the tripod, pan around, zoom in & out, but you can tell that all of the photos were taken from the exact same location. Move around! Get low! Walk!
What I’m trying to say here is, don’t use a tripod unless you absolutely need to for the above three reasons. They get in the way, especially in congested public spaces, add weight to your kit, and the technology makes them obsolete for some traditional purposes.
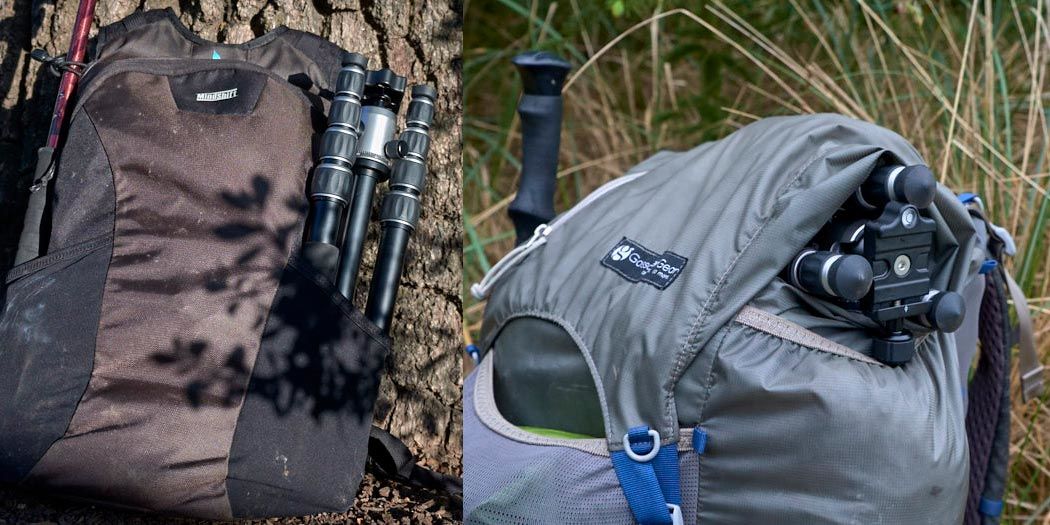
If you do need a tripod, you don’t need to get an $800 beast capable of holding 40 pounds. That’s ridiculous. Get something small and durable (I like MeFoto/Benro’s tripods – read my comparison of their offerings here). These tripods are more than capable of steadily holding your Fujifilm camera and without adding unnecessary cost or weight to your kit.
And if you need to add extra stability, hang your camera bag from the center column hook and they’ll become rock-steady in windy conditions.
Filters
Filters are other accessories that photographers seem to go crazy about when they’re not really needed.
UV/Haze filters are one such controversial accessory. Here’s my take.
You buy a slick $1,200 Fujifilm lens with some of the best optical quality on the market and then put a cheap $19 glass filter over it. Then why’d you get an expensive lens?
These filters can provide protection, but so can a lens hood. I haven’t used a UV filter for years and all of my lens front elements are still in tip-top condition because I always have the lens hoods attached and use the cap. The light only has to go through my nice Fujifilm lenses, not the cheap glass filter first.
There was only one time I regretted not having a UV filter on my lens. Some flying rocks dinged my lens when photographing near a Blackhawk helicopter in the desert.
Go ahead and get a clear UV filter just in case you’re in similar situations. But only use it when you absolutely need the protection.
And as far as “UV filtering”…this is obsolete in digital cameras. The sensor is not affected by UV light in the way film is. These filters are merely physical protection.
That’s just the beginning…
As mentioned in the top of the article, this is just to get you thinking about the essentials for starting to build up accessories for your Fujifilm kit.
There are all sorts of other things you can add – shutter release buttons, cases, designer straps, battery grips, strobes, and more.
But after deciding on your lenses, and deciding on your camera body, the things mentioned in this article will be next for you.
I’d appreciate any feedback you have below. Thanks!

tigret
Friday 28th of October 2022
Bless you for doing this. I'm just starting out, and your guides stand out for their coherency, readability, and immediate and long-term usefulness.
John Peltier
Saturday 29th of October 2022
Glad it's helping, thank you for the feedback!
Building your Fujifilm Photography Kit Part 2: The Lenses - DIY Photography
Monday 14th of March 2022
[…] You can read Part 3 of this series, Finishing your Fujifilm kit with accessories. […]
Building your Fujifilm Photography Kit Part 3: Essential Accessories - DIY Photography
Tuesday 1st of March 2022
[…] about him on his website, Instagram, YouTube, and Twitter. This article was also published here and shared with […]
John
Thursday 16th of September 2021
This is a great article. It also dispels various myths and other things. When you start taking pictures, you get the same advice like only use a tripod, always use a filter, full-frame is the best, and so on. Especially as a newcomer, you take all the advice and invest a lot of money.
But the tripod is too heavy and you always leave it at home. The filter is annoying, which is why you never mount it. Full format is big, heavy and expensive and the pictures don't get any better. The 500 dollar backpack stays in the corner and collects dust.
At some point, maybe years later, you realise that you only need a little equipment to take great photos.
Keep it up. These are always valuable articles.
John Peltier
Friday 17th of September 2021
Thanks for the feedback John! A lot of photography gear advice out there isn’t necessarily “wrong,” but just lacks the proper context. Hence why so many people out there end up with expensive tripods they never use, because they never knew whether or not they actually needed it before making the purchase!
Curt
Thursday 16th of September 2021
This is a great series of articles! I wish I had something like this when I was starting out - I could have saved a lot of $$. I really like the idea of building the small specialized kit bags to grab on the run, which I intend to set up soon.
For what it's worth - here's my "two bag" system - most of my basic kit is in a small Lowepro sling bag that I've had forever and it's easy to grab and go. It holds my X-T4 w/a 16-80 zoom, plus some combination of an extra zoom/a small prime (or two)/a speedlight plus a charging cable, spare cards and an extra battery - it's super easy to get to the camera as well. My "bigger" bag is an over the shoulder Tenbo Slim Messenger 15 that holds the rest of my kit and other supplies as well a laptop or tablet. Both bags are very travel friendly (either overhead or under the seat in front of me).
John Peltier
Friday 17th of September 2021
That’s awesome Curt, thanks for the ideas! Tenba also makes great bags.