Disclosure: This post may contain affiliate links. I earn a small commission of product sales to keep this website going.
One thing I learned as a flight instructor is that student pilots often make the same mistakes as other student pilots. This makes identifying and correcting those mistakes a lot easier. It also makes the instructor sound a lot more observant than they really might be 🙂
The same holds true in teaching photography. So here are some of the most common reasons I’ve seen for why photos aren’t sharp.
You can also watch the video here:

1. Shutter speed too slow
Surprisingly, this is the most common reason new photographers have blurry photos. If you want sharp photos, you need to make sure that your shutter speed is fast enough to freeze any movement. There’s an art to create intentional blur, but it can ruin a photo if it’s unintentional.
While I can’t just give you one number that will work for everything, there are generally two categories of movement: camera movement and subject movement.
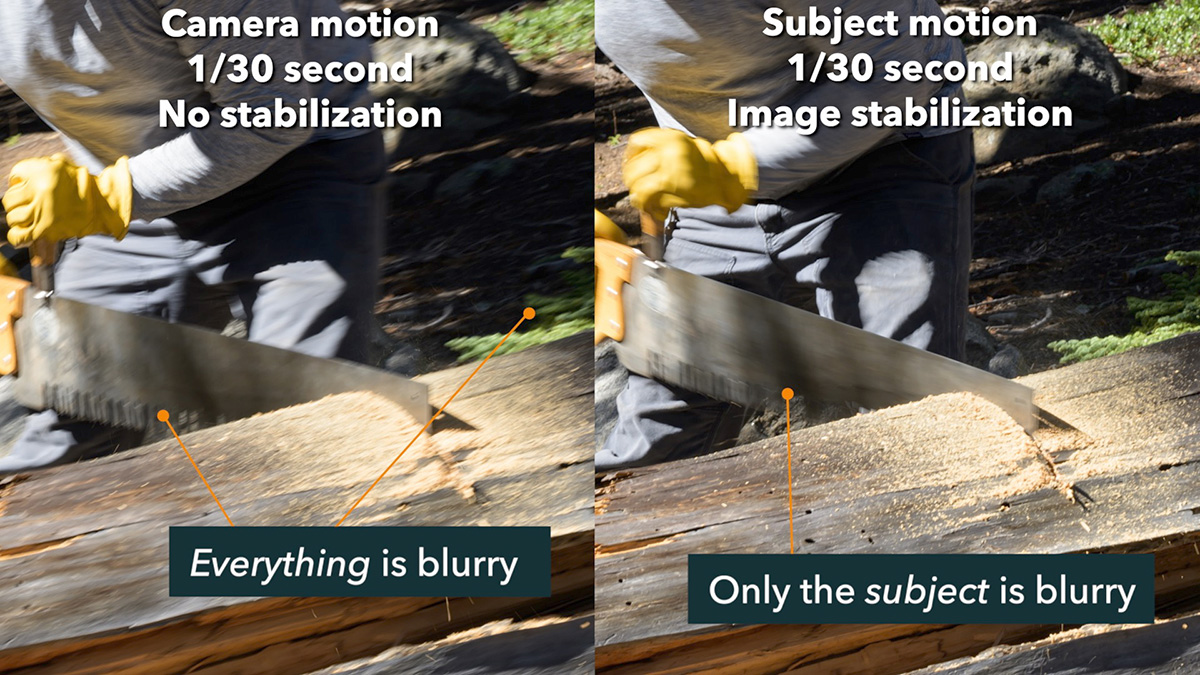
Camera movement
This is when you move the camera enough while the shutter is open to introduce blur. Even if you’re photographing still life, you can have a blurry photo if the camera moves. Avoid this by:
- Using a tripod or some other fixed base
- Enabling Image Stabilization in your lens or camera
- Use the “inverse focal length rule” for your shutter speed
Both image stabilization and the inverse focal length rule are discussed in length in this article.
Subject movement
Your subject will be blurry if it moves while the shutter is open. The difference from the previous section is that everything else (your background) will be sharp.
What you choose here will depend on what you’re photographing. Someone sitting for a portrait session may require 1/125 second. People walking on the street may require 1/250. Increase it to 1/2000 for birds in flight or other wildlife.
Again, it all depends on the situation, and this will only come with experience.
Raise your ISO
Sometimes photographers know their shutter speed is too slow. When asked why, the response is, “to keep my ISO low.” Don’t get me started on this again!
Read this article to understand why shutter speed should take precedence over ISO, and how to use Auto ISO to address this.
You’ll see a huge increase in sharp photos once you embrace Auto ISO.
2. Incorrect focus technique
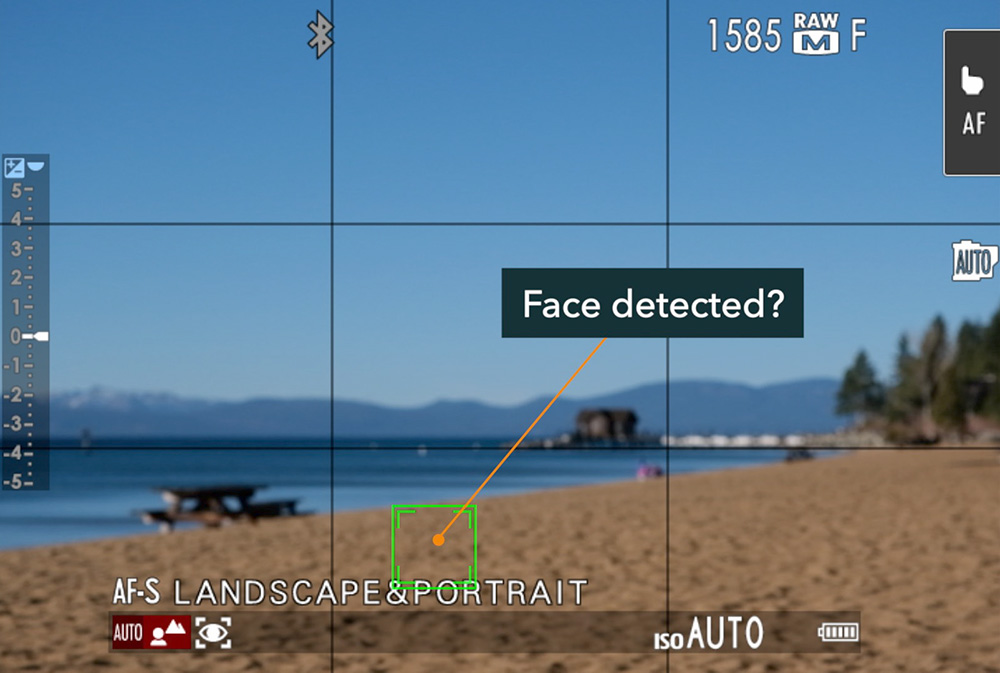
Autofocus technology has come an incredibly long way in the past few years! From detecting faces and eyes to instantaneously tracking different types of subjects, it’s taken a lot of the work out of what we need to do.
Having all of these options is great until it isn’t. You really need to know when each mode is appropriate for different situations and how to quickly switch modes and settings when needed.
Face and Eye Detection, for example, is great when used properly. However, it can create huge problems when misunderstood.
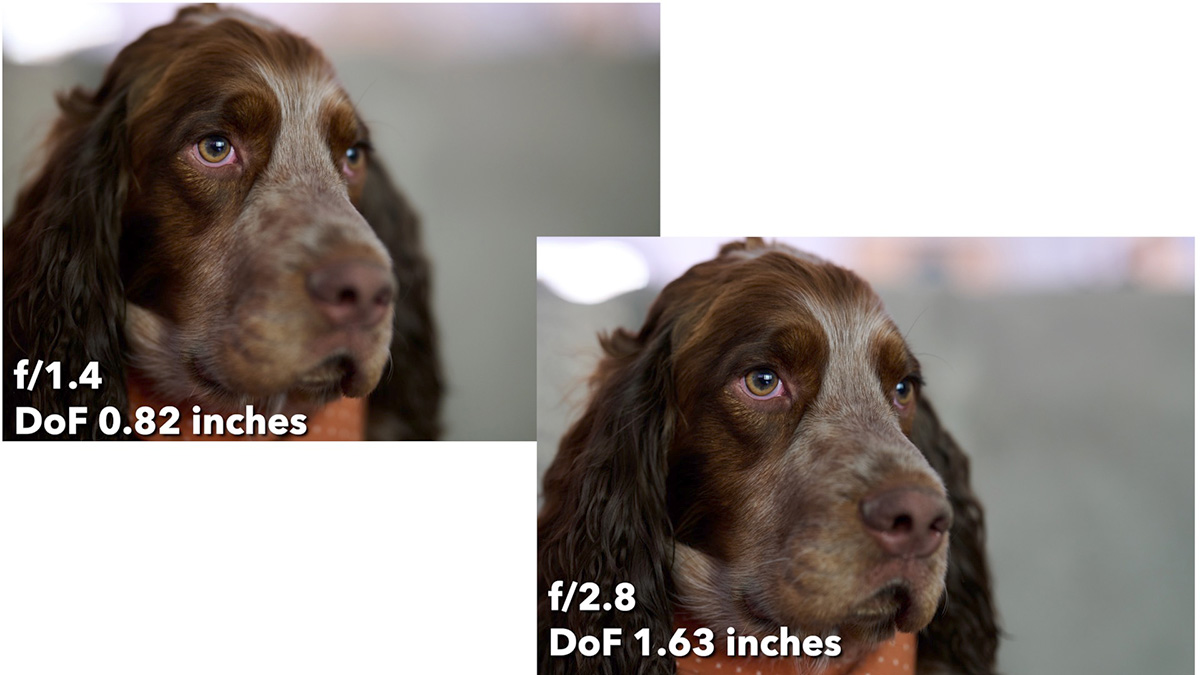
3. Misunderstanding depth of field
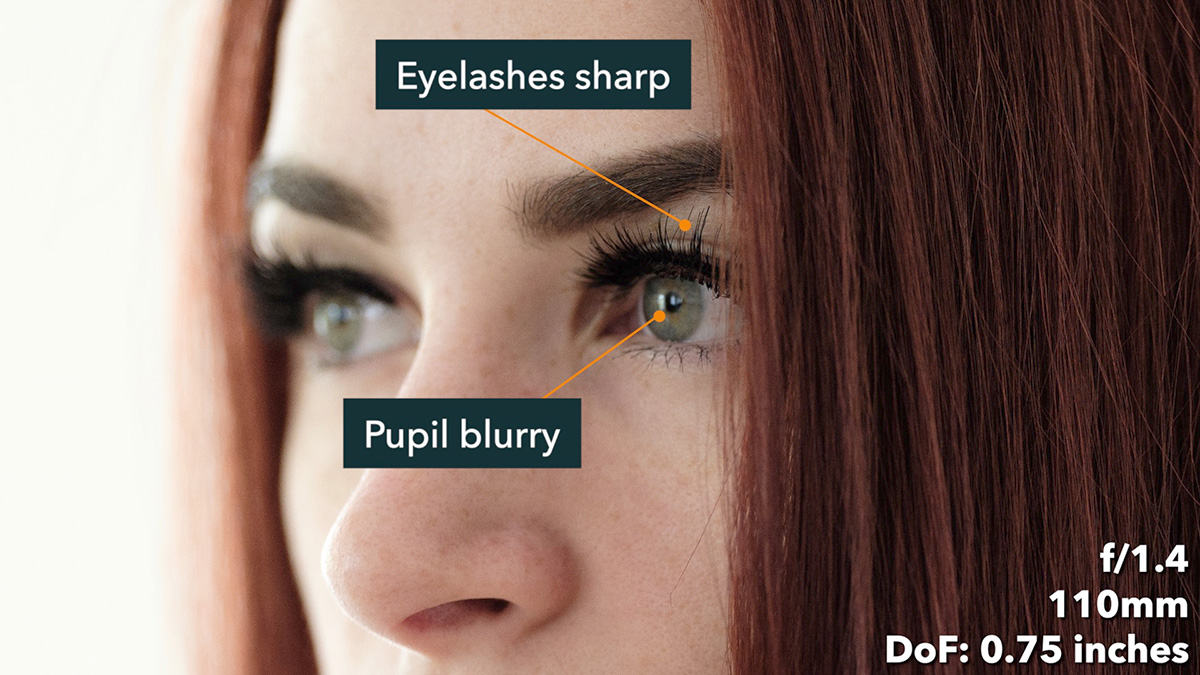
Being aware of your depth of field is critical for sharp photos. Everyone loves f/1.4 for “bokeh,” but this leaves no room for error when focusing. You could think you’re focusing on someone’s eye only to find that the eyelashes are in focus while the pupil is blurry. That’s because your depth of field could be less than an inch deep in typical close-up portrait situations.
Be aware of how your combination of aperture, focal length, and focus distance impacts your depth of field and the implications of that. When your depth of field is intentionally shallow, you really need to nail your focus point.
Some rules of thumb to remember. Your depth of field will shrink as:
- Your aperture increases (f-number decreases)
- Your focal length increases
- Your focus distance decreases
- These changes are cumulative
The Advanced Depth of Field course will help you learn how all these affect depth of field.
4. Diffraction at small apertures
In the previous section you learned that if you want a deeper depth of field, you need to close your aperture – get those small f-numbers like f/16 or f/22.
Doing so comes at a cost, however. And that cost is called diffraction.

When the aperture (opening) of the lens is really small, all that light coming in has to squeeze and bend to cover the sensor on the other side. That squeezing and bending causes the light to not quite line up properly, to put it in simple terms. The image will appear softer than if it were created with a larger aperture. Diffraction typically starts to happen around f/16 and gets worse approaching f/22 to f/32.
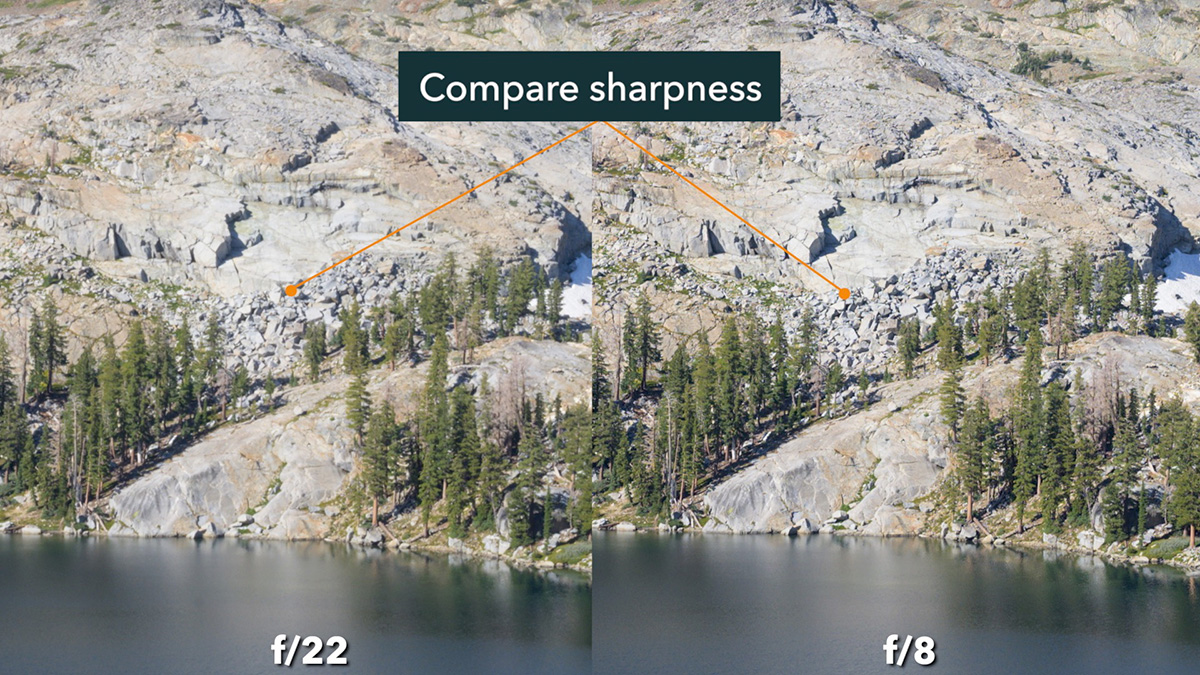
The lesson here being, don’t go to those small apertures unless you need to. Use the widest aperture possible for the depth of field you need. If you can get an infinite depth of field at f/8 (as you can with wide-angle lenses, for example), then stay at f/8 – don’t stop down to f/22. That will also help you use faster shutter speeds – further helping you obtain sharper photos.
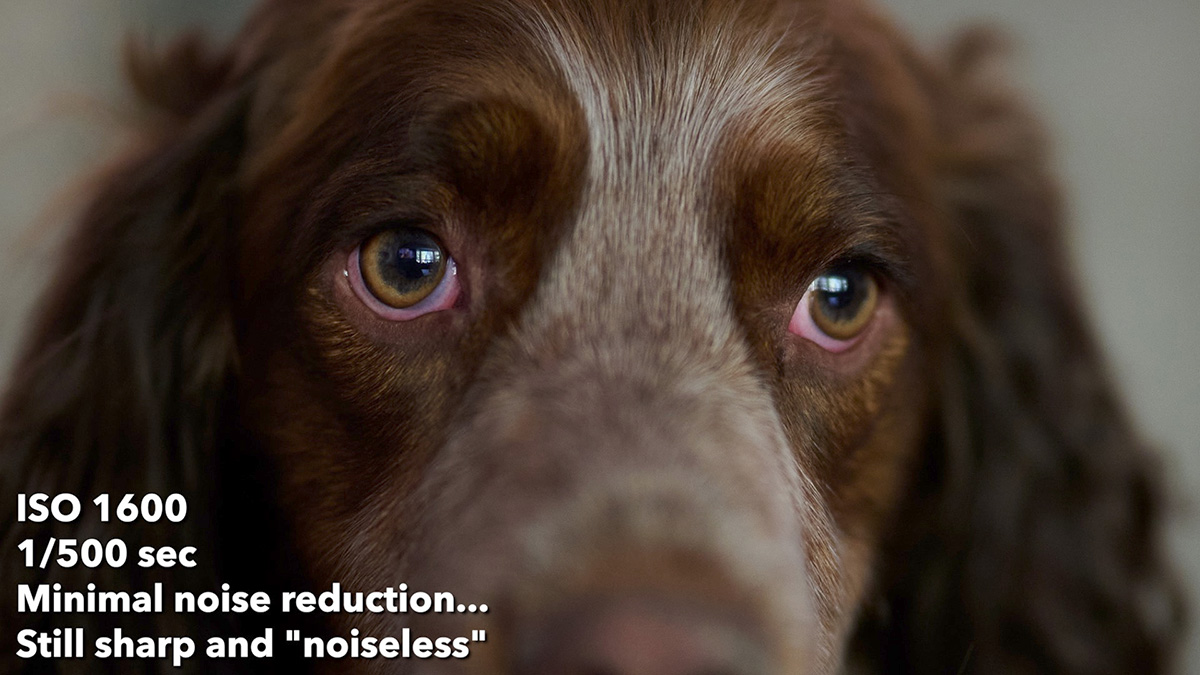
5. ISO is too high
Wait a minute, didn’t I say to embrace higher ISOs in the beginning?!
Yes, but it’s all a tradeoff, as is everything in photography. Of course staying at ISO 25600 all the time is going to give you softer photos and blotchy colors. This is due to the amount of gain applied and the noise created through that amplification. It’s similar to pumping up the volume of someone speaking softly into the microphone. You’ll hear the noise a lot more than if someone were speaking loudly into the microphone.
This doesn’t necessarily cause your photos to be soft – they can still be sharp and in focus – but the processing required to minimize that noise can cause your image to appear softer.
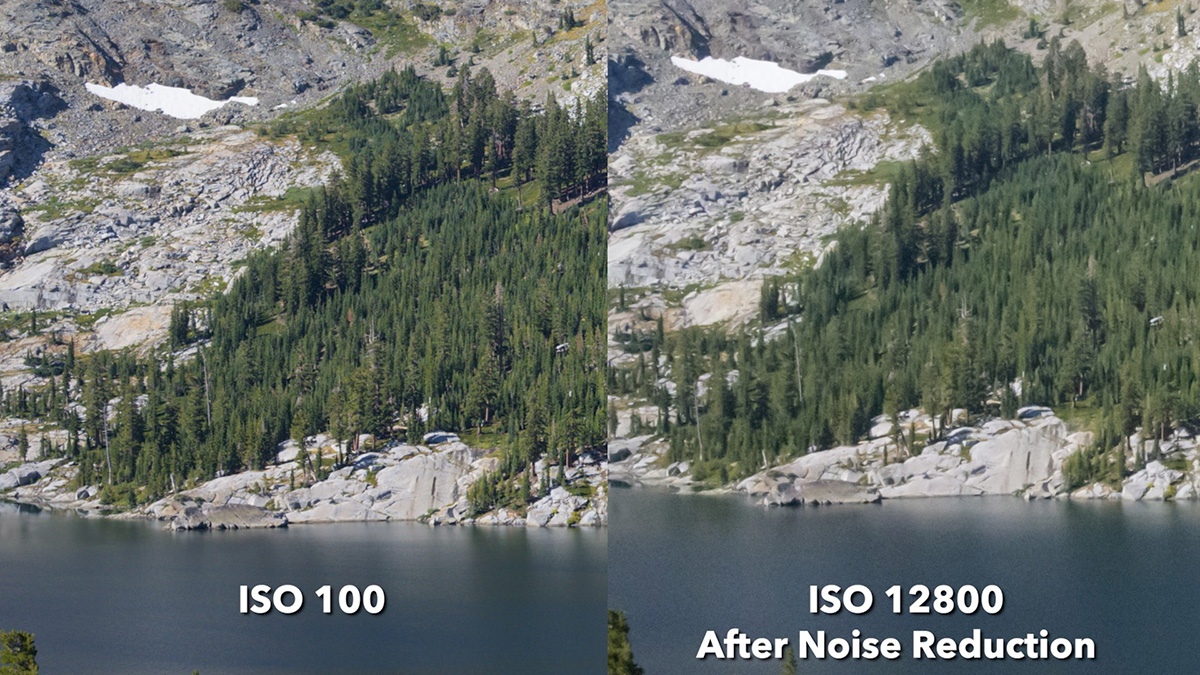
Like the previous paragraph, only go as high as you need to with the ISO. Raise that ISO until your shutter speed is fast enough to freeze movement and stop there.
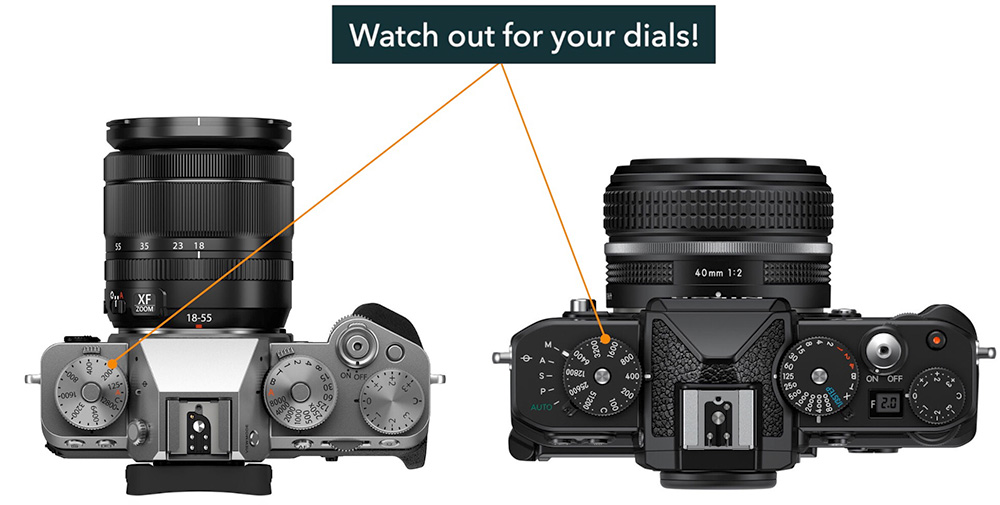
It’s really easy to accidentally change the ISO on some cameras, so be aware of that too. You might have raised your ISO to 12800 if you’re manhandling your camera while taking it out of your bag and not even known it.
Which factors affect the sharpness of YOUR photos?
As we saw in this article, there are several reasons why photos aren’t sharp.
It’s important to be able to identify which factors could affect sharpness in the particular situation you’re in. Is it handheld movement or subject movement? Then ensure stabilization or a fast enough shutter speed. Do you need a deep depth of field? Then be careful with diffraction, only stopping down as much as you need.
Hopefully this list – while not going too in-depth for each one – will make you more aware and help you get sharper photos.