Disclosure: This post may contain affiliate links. I earn a small commission of product sales to keep this website going.
Why Create Custom Menus in your Nikon Z?
The Nikon Z menus have a lot of options. It can be overwhelming! So much so that it may prevent you from going in there and finding the right settings to change when it matters.
This can actually handicap you as a photographer.
The reality is that, after getting your camera initially set up, you may only ever use 2-5% of everything that’s in there regularly.
Wouldn’t it be nice to be able to put those few options into custom menus so that you don’t have to hunt around for them all the time? You can, by customizing Nikon Z’s My Menu and the i Menu.
This is an excerpt from the first chapter of my Nikon Z Photography Fundamentals course; the first chapter is all about camera setup and using the menus.
You can also watch the video on YouTube:
Creating My Menu in Nikon Z
My Menu is probably my favorite menu in Nikon Z. This menu is a consolidation of up to 20 of your most-used menu items. Not just items from the other menus, but you can also place submenus as top-level items in My Menu in some cases. Everything you use is right there on one page.
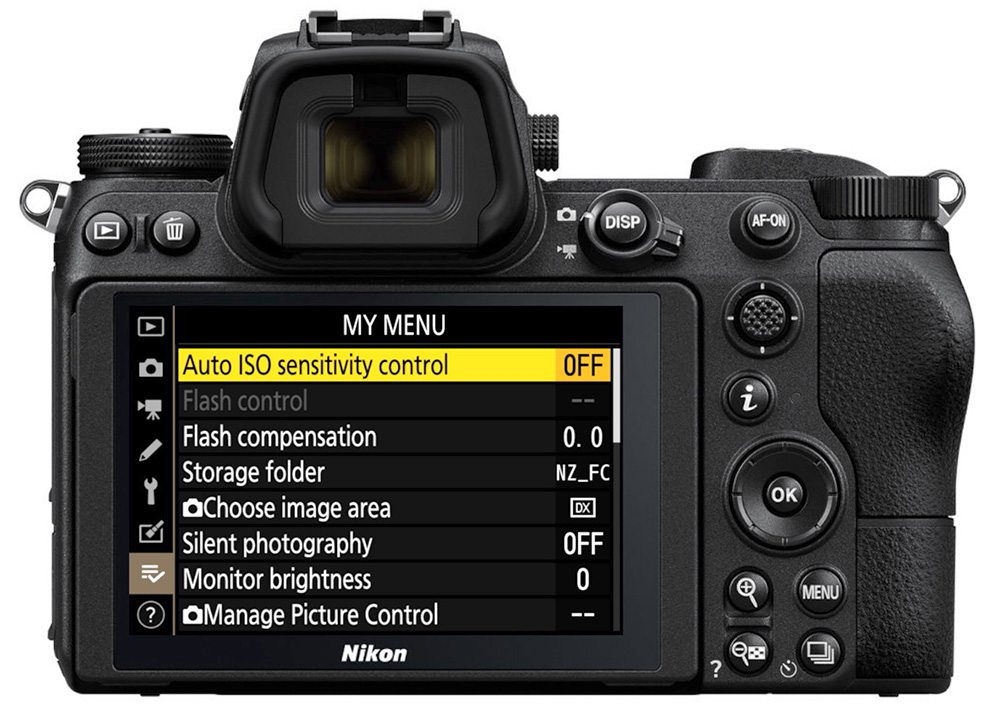
For example, in my Nikon Zf, I toggle between Auto ISO and Manual ISO a lot. Toggling Auto ISO on and off would normally require you to go into the Photo Shooting Menu, then ISO sensitivity settings, then Auto ISO sensitivity control. In My Menu, I put Auto ISO sensitivity control at the top, so I don’t even need to go into the ISO sensitivity settings main menu.
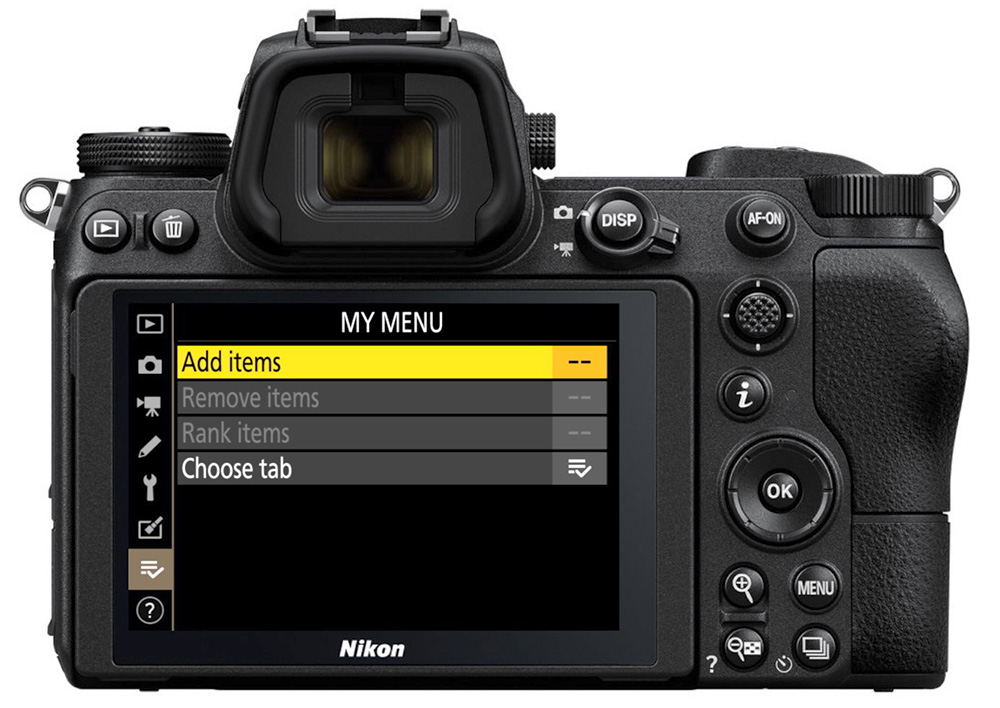
Customizing My Menu:
- Press Menu and go to the bottom (My Menu)
- Select Add items
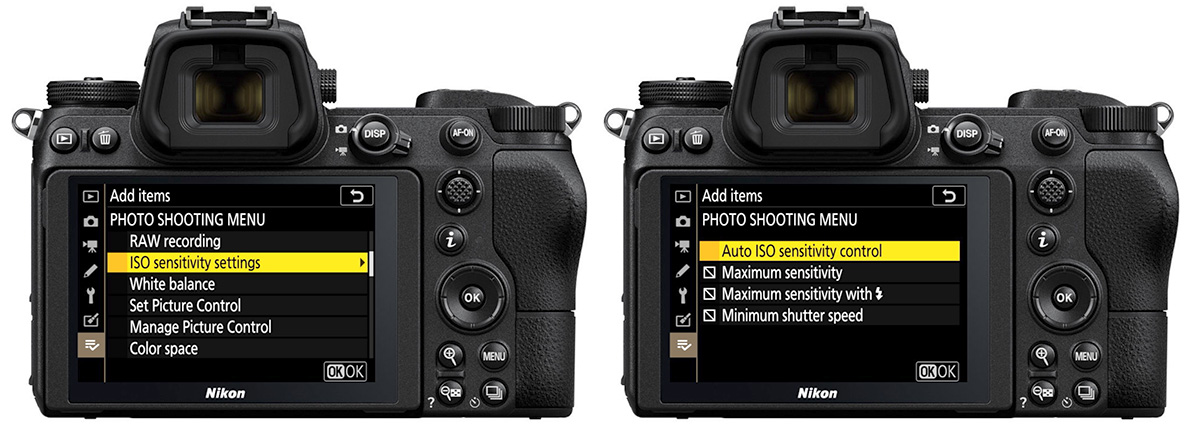
- Go into the menu group your desired item lives in, select that item, and press OK
- Use the multi selector up or down to rank that item in My Menu (N/A when adding the first item)
- Repeat this process for up to 20 items, ranking your most-used items towards the top
Some items (like Reset) can’t be added to My Menu. These will have a box with a slash through them when adding items.
You can also, as mentioned, add submenus for some menu items. You’ll see these have an arrow next to the menu item when you’re in the Add function; press the multi selector right to go into that submenu if you want to add it.
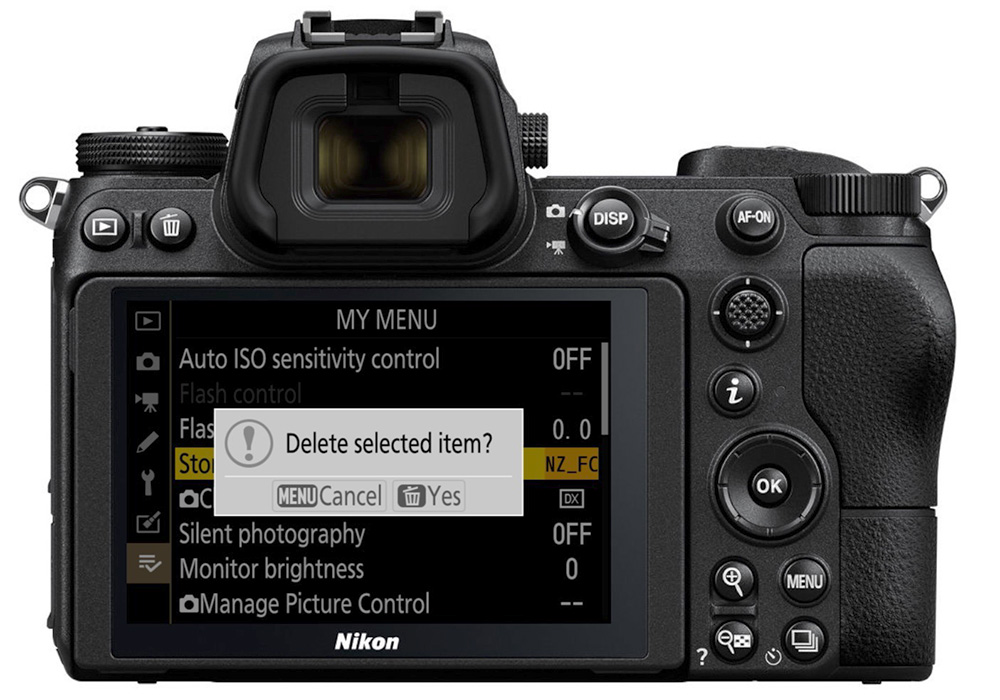
You can quickly delete an item from My Menu by selecting that item and pressing the trash can (delete) button.
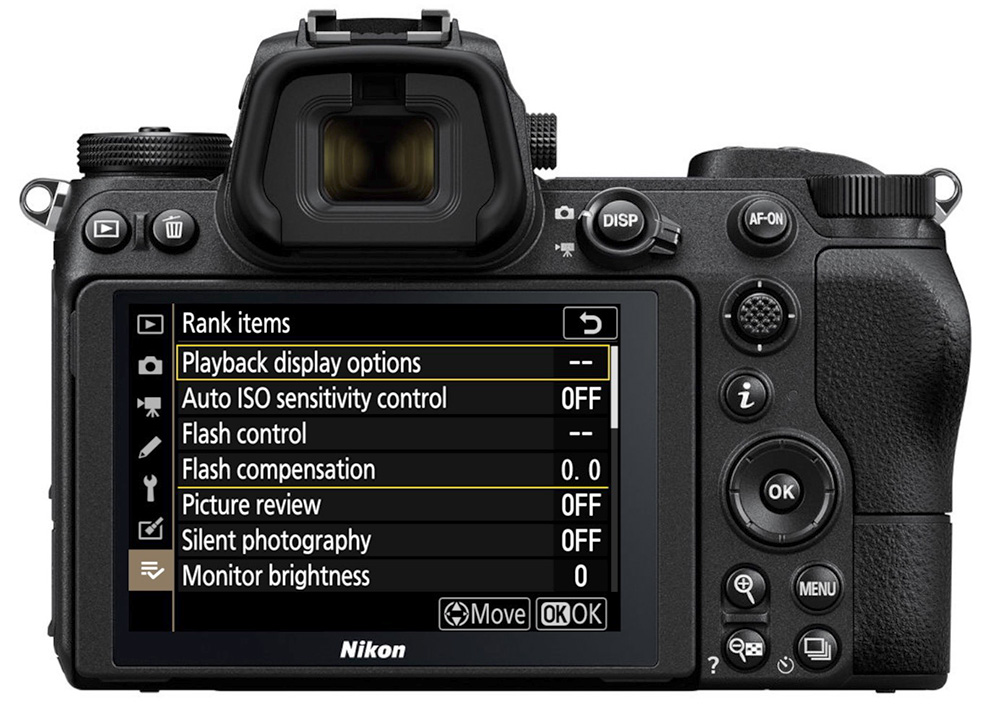
If you want to reorder items, go to the bottom of My Menu and select Rank items. Highlight the item you want to move, press OK, use the multi selector to move it, and press OK again to save.
The Recent Settings Menu
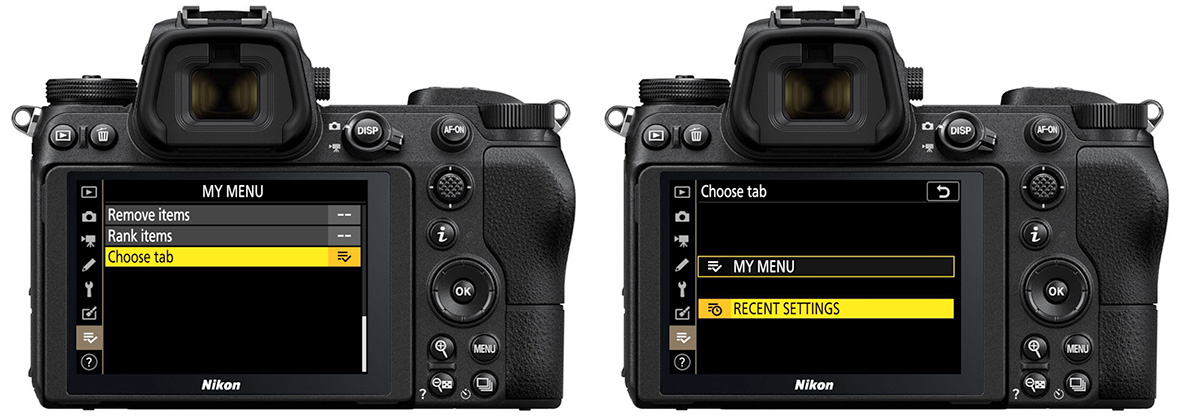
When you’re at the bottom of My Menu, you may have noticed a Choose tab option. This lets you toggle between My Menu and Recent Settings.
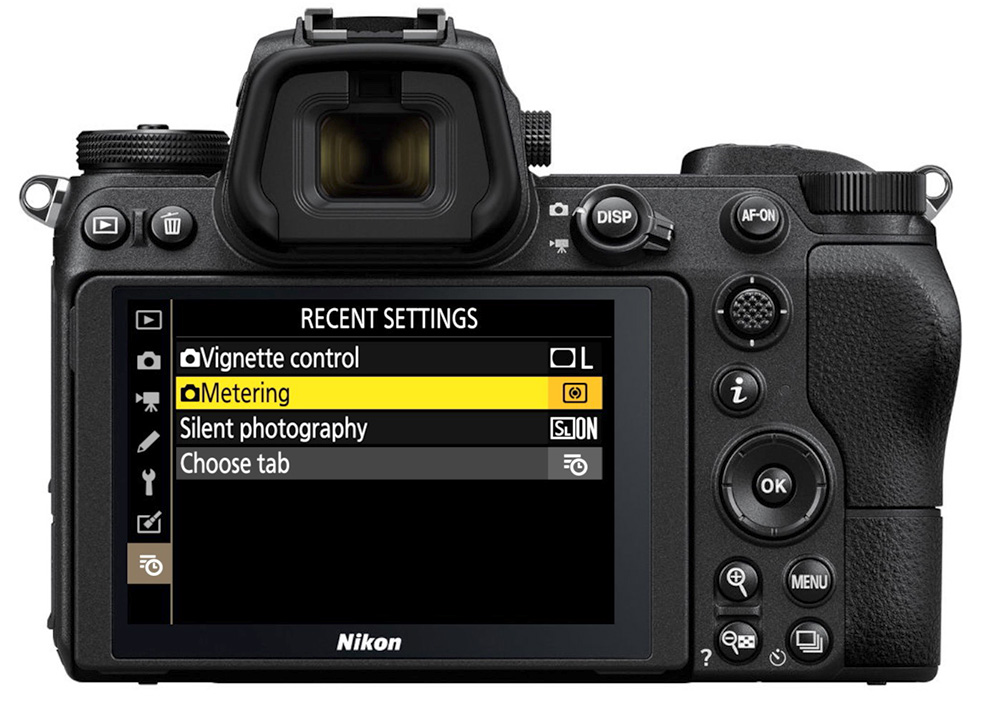
Recent Settings is like a dynamic My Menu. It will change based on which settings you’ve used most recently.
This might be better than My Menu if your most-used settings change based on what you’re shooting. Say you’re traveling and you use a certain group of settings when traveling. Then, you use a different group of settings when you’re back home and taking pictures of your kids. The Recent Settings tab will change based on these scenarios.
You can always swap between My Menu and Recent Settings by using Choose tab.
Customizing the Nikon Z i Menu
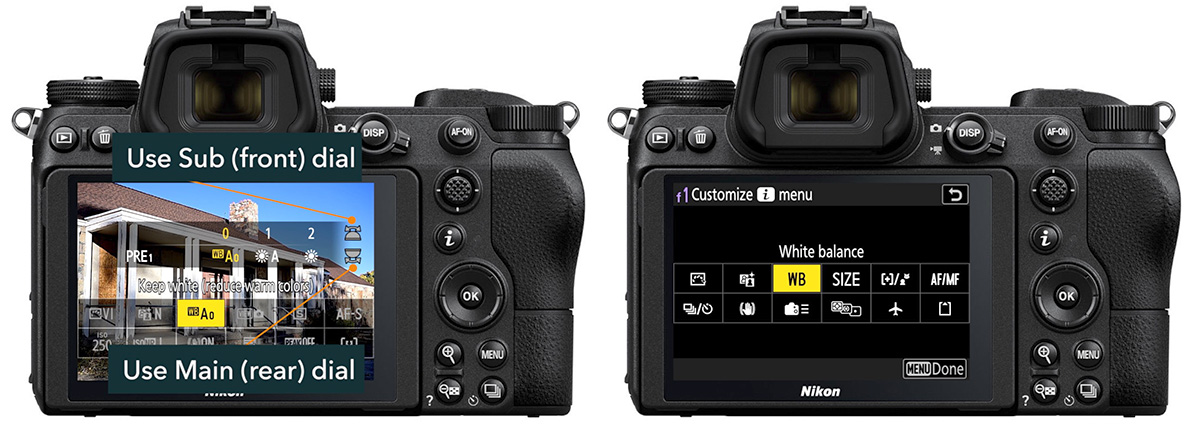
You don’t always need to go into the main camera menu to adjust your commonly-used items. Press the i button to enter the i Menu. This menu pops up on the bottom of your shooting screen with 12 customizable shooting settings that you can quickly change with either the command dials or the touchscreen.
Nikon has programmed this for you, but you might not find all of the programmed options useful; you may want different settings to quickly change using this menu.
Program the i Menu by pressing Menu, going to Custom Settings, then f1 Customize i Menu. Choose the slot you want to change, press OK, select the new item, and press OK again to save.
You can have different i Menus for both photo shooting mode and video recording mode. The video i Menu can be customized in Custom Settings g1.
Final Thoughts on Using Nikon Z’s My Menu and the i Menu
You know which settings you want to put in these custom menus, but should they go into My Menu or the i Menu?
You are limited to what you can put into the i Menu. Whereas most camera settings can be placed in My Menu, only a handful of settings can be placed in the i Menu. That kinda makes your selection easier, but it also makes sense.
If you frequently change your White Balance, doing so in the i Menu is quick, easy, and lets you preview those changes as you do it. In My Menu, you’d just be picking from the list on a black screen. So doing this in the i Menu makes more sense.
I think of “this current picture” settings as those I’d want to put in the i Menu. Things like White Balance, Picture Control, Release Mode, Focus Mode, AF-Area Mode, and Active D-Lighting. I also included some items I might need to change really fast, like Shutter Type, Vibration Reduction, Focus Peaking, and Monitor Brightness.
My Menu contains items I don’t use as much or change as frequently while shooting. These include Auto ISO Sensitivity Control, Image Quality, Image Area, Manage Picture Control, Auto Bracketing, Connect to Smart Device, and Metering Mode, among others. Some are repeated between menus only because I have the room in My Menu.
Use your menus more efficiently
Customizing your Nikon Z menus can really help out your photography by making you a more efficient photographer.
If you want to learn more about using the Nikon Z menus, the entire first chapter of the Nikon Z Photography Fundamentals course is all about using the menus and setting up your camera. Many of the lessons in this chapter are included in the free previews, and you can also use the code “blog20” for 20% off the entire course.
Questions or comments? Let me know below!