Disclosure: This post may contain affiliate links. I earn a small commission of product sales to keep this website going.
There are a lot of ways to customize your Fujifilm camera displays. The contrast, colors, what happens when the camera is rotated, etc.
This article is going to address some questions that commonly come up in my Fujifilm photography courses, specifically concerning what is actually displayed on the screen.
Some cameras do have extra, very specific options, and some cameras may not have all of these.
But I hope this helps get you started regardless of which camera you have!
View Mode Setting
First things first, let’s take a look at which displays are on and when. Do you want your LCD screen to always be on or always be off? Do you want the LCD to turn off when you bring the camera up to your eye, when the EVF will then turn on?
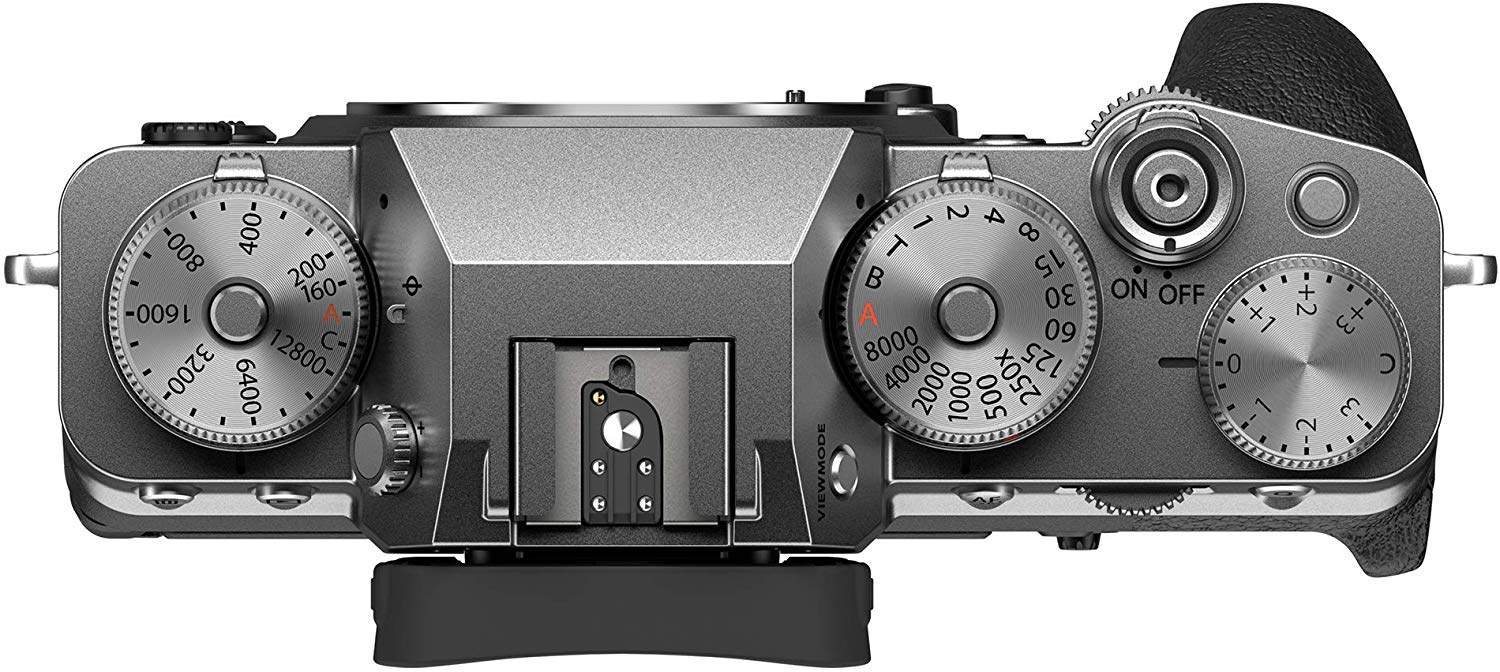
Some cameras, such as the X-T30, X-T4, and GFX 50SII have a VIEW MODE button. You can press this to cycle through the options. Press the button while in Shooting Mode to cycle the shooting setting, and press it in Playback Mode to cycle the playback setting. You may have to look through the EVF to see which mode it’s in.
Other cameras, like the X100V, X-E4, and X-S10 have a VIEW MODE SETTING in the SCREEN SET-UP menu.
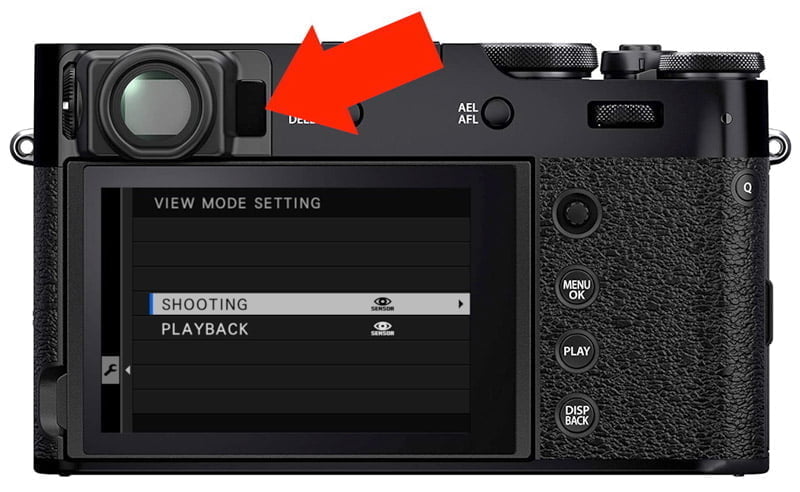
Shooting
- Eye Sensor: The LCD will be off and the EVF will be on when your eye is up to the camera. When the camera is down, the LCD will be on and the EVF will be off.
- Viewfinder Only: The LCD will always be off and the EVF will always be on.
- LCD Only: The LCD will always be on and the EVF will always be off.
- EVF + Eye Sensor Viewfinder Only + Eye Sensor: The LCD will always be off and the EVF will only come on when your eye is up to the camera.
- Eye Sensor + LCD Image Disp: The LCD will always be off, except for image playback when your eye is not next to the EVF. The EVF will only come on when your eye is next to the viewfinder.
Playback
- Eye Sensor: The LCD will be off and the EVF will be on when your eye is up to the camera. When the camera is down, the LCD will be on and the EVF will be off.
- Viewfinder Only: The LCD will always be off and the EVF will always be on.
- LCD Only: The LCD will always be on and the EVF will always be off.
I prefer Eye Sensor for Shooting and LCD Only for Playback. Experiment to see which one you prefer.
Cycling Displays
Not seeing any information on the screen? Seeing a black screen with too much information and no image?
Different displays are available in both Shooting Mode and Playback Mode.
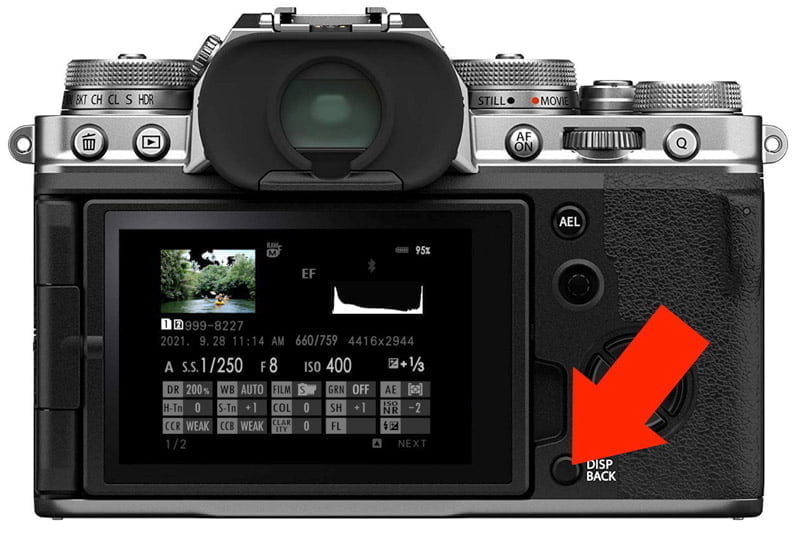
You can cycle through the displays in each mode by pressing the DISP/BACK button.
You can see just the image with no information, the image with information in the margins, and a black screen with extra image information.
Large Indicators Mode
Do you see very large symbols in your display, and not much is displayed because the symbols are so large?
Or maybe the default small symbols are difficult to read, and you wish they were larger.
Fujifilm’s Large Indicators Mode will replace the default small symbols that cover the margins of the screen and replace them with fewer symbols that are larger and easier to read.
Customizing Large Indicators Mode
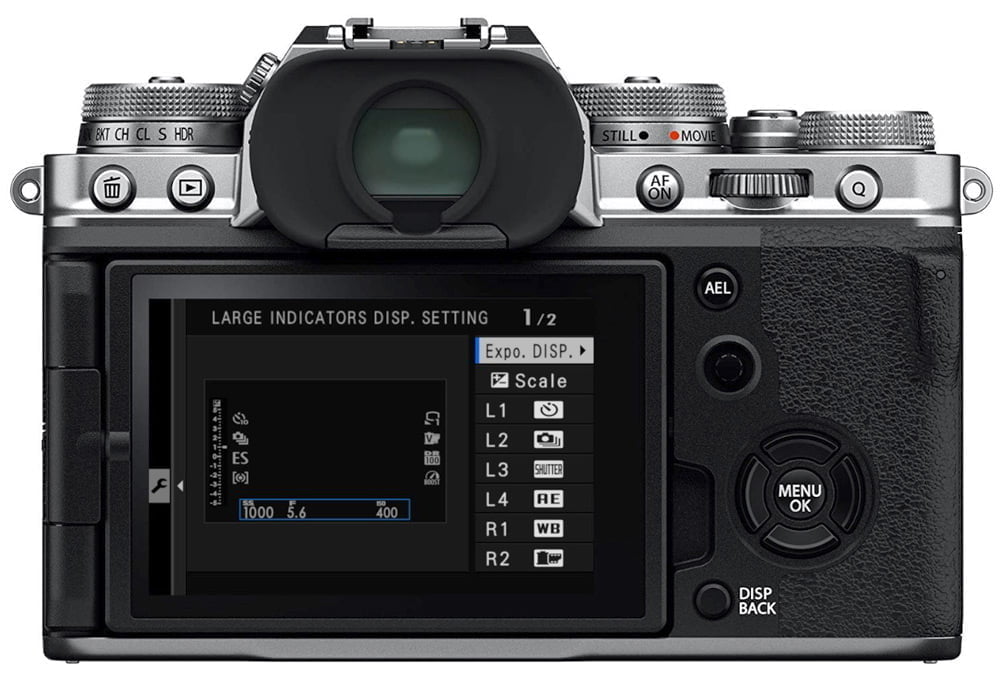
Customize which information is displayed in Large Indicators Mode under SET UP > SCREEN SET-UP > LARGE INDICATORS DISP. SETTING.
Use this submenu to customize which information is displayed when using Large Indicators Mode.
You can choose which exposure information is displayed at the bottom of the screen under Expo. Disp. You can also enable or disable the exposure scale. Then select which information you want displayed in the four icons on the left side and four icons on the right side. Don’t want anything displayed? Select NONE.
Using Large Indicators Mode
Enable or disable Large Indicators Mode for the EVF/OVF, LCD, or both.
You’ll see Large Indicators Mode for the viewfinder and LCD on the last page of the SCREEN SET-UP menu. Turn this on or off as appropriate.
Framing Guideline
A framing guideline overlay is useful to aid in your compositions.
You can choose which guideline you prefer under SET UP > SCREEN SET-UP > FRAMING GUIDELINE.
Most other photographers and I prefer Grid 9, which is your standard “rule of thirds” grid.
Note that this submenu only selects which framing guideline you prefer. It will not be displayed unless “FRAMING GUIDELINE” is enabled in the Disp. Custom Setting submenu!
Disp. Custom Setting
Use this submenu to select which information is displayed in the standard indicators display.
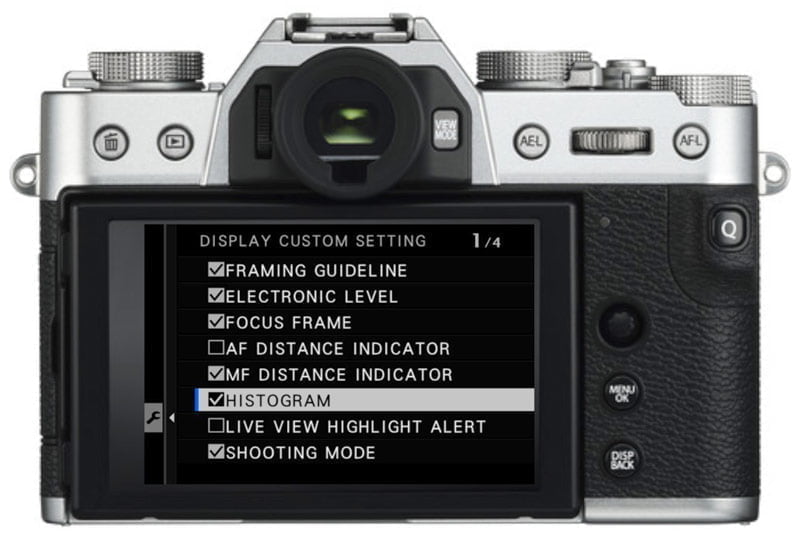
The changes you make in here will be mirrored in both the LCD and the EVF; cameras with optical viewfinders like the X100V and X-Pro3 have additional customization available for the optical viewfinder.
Anything with a checkmark next to it will be displayed.
If you find some information annoying, you can remove the checkmark next to it.
One such “annoying” thing that many photographers report but don’t know how to turn off is the “black and white blinking areas.” This is called the Live View Highlight Alert and shows you which areas of the image are overexposed. Turn this off if you don’t want it.
Customizing your camera
Fujifilm cameras are wonderful in that they offer so many customization options. You can customize the buttons, menus, and image aesthetic settings.
I hope this gets you started with customizing your Fujifilm camera displays!
For further information about your specific camera, you can check out my Fujifilm Camera Tutorial courses, and don’t forget to use the coupon code “blog20” for 20% off.
Please leave any questions or comments below!
