Disclosure: This post may contain affiliate links. I earn a small commission of product sales to keep this website going.
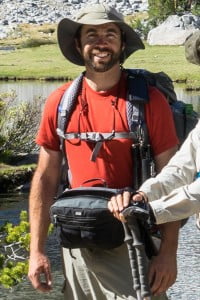
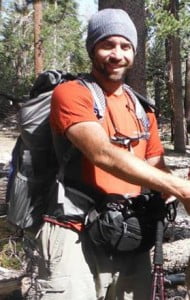
This is an unsolicited review from backpacking 200 miles with my new favorite camera bag for my new favorite cameras, Think Tank’s Hubba Hubba Hiney and a Sony a6000/Sony a7 w/ 10-18mm & 24-70mm lenses.
I recently switched from a Canon DSLR to the Sony mirrorless cameras for reasons outlined in this article. I’m happy to say I’m going to stick with it! Part of the downsizing process includes downsizing camera bags as well.
Backpacking with cameras requires keeping the camera accessible at all times but protected from the elements; for a large DSLR this usually involves some kind of chest holster like the Lowepro Toploader Pro, worn on the chest, as outlined in my 5 Lightweight Backpacking Tips for Photographers post.
The system worked for me but was overkill for my new cameras. I needed a new backpacking camera bag. Because of the small size and light weight, I was looking at belt packs and decided on Think Tank’s Hubba Hubba Hiney based on my previous excellent experiences with Think Tank camera bags. This bag was about to follow me for 200 miles through the Sierra backcountry.
Think Tank Photo bag – Hubba Hubba Hiney
- Price: $64.75 (including shoulder strap but not belt)
- Weight: One pound
- Exterior Dimensions: 11.4″ W x 7.3″ H x 5.3″ D
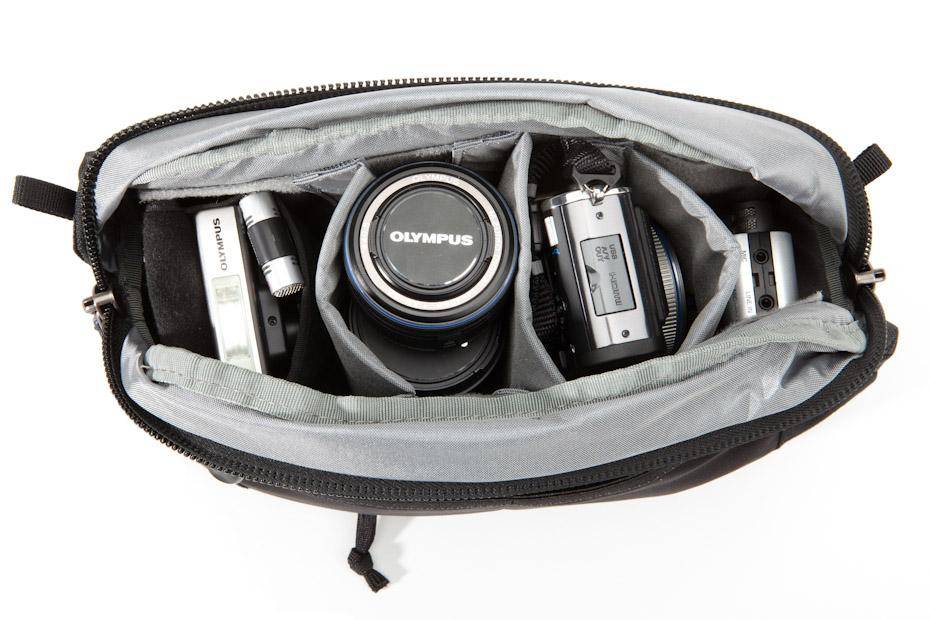
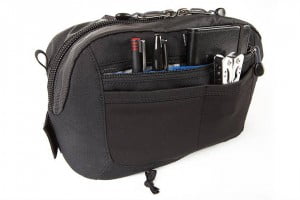
Think Tank’s Hubba Hubba Hiney. Photo from Think Tank Photo.
I bought the Hubba Hubba Hiney with Thin Skin Belt just a few weeks before leaving on my big trip on the John Muir Trail. Not a lot of time to make sure this bag would work for 200 miles in wilderness conditions! This bag is actually advertised as a shoulder camera bag but convertible to a hip camera bag with attachment points on the back of the bag. Think Tank’s belt system allows for many modular component options.
I took it on a few day hikes and an overnighter. I wore it as a shoulder bag with included shoulder strap, and with the belt as a hip pack. I was never really a fan of hip packs. Remember the 90’s? Dear God. Flashbacks of day-glow fanny packs.
Wearing the Camera Bag
Wearing this bag on the shoulder works great for normal day-to-day photography. It’s comfortable because of the light weight and unless you’re carrying lead in the bag, the cameras it carries won’t be too heavy.
Wearing it as a shoulder bag while backpacking and hiking is a different story. It just crashes into everything. If you’re jumping over rocks the bag starts oscillating and slamming into everything, including you. You can’t keep it at your side or behind you because of your backpack so it just swings out in front. This is where the belt saves the day.
I experimented with putting the backpack on first, then the camera bag, and vice versa. It’s definitely easier to put the camera bag on first (it buckles in the back) and then your backpack. If the buckle is too high up it digs into your spine where the backpack pushes against it, but there’s a sweet spot in the small of your back where you don’t feel the buckle at all and can comfortably wear it all day.
The bag is also small enough where I could bend forward without it impeding my mobility. I’ve worn larger belt packs that prohibit bending forward at the hips too much, but not with this bag.
Camera Protection
I was in some extremely dusty conditions for most of the three weeks on the trail. The bag appeared to do a good job of keeping the dust out. I only noticed dust accumulating on the camera when I had it out of the bag.
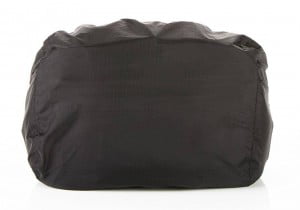
The bag offers great rain protection as well. We got caught in a few light showers and I didn’t bother to put the rain cover on; the exterior of the bag is treated with a durable water repellant coating. The fabric would get moist but the inside stayed dry. I kept some desiccant packs inside for good measure.
When the rain really started to pick up I could deploy the rain cover in a matter of seconds. A zipper on the front of the bag reveals a small pouch containing the seam-sealed rain cover, attached to the bag with webbing.
The sides and bottom of the bag are made of some sturdy medium-weight foam, as are the dividers, but the top is just nylon fabric.
Organization
The bag is deceiving in its organizational capabilities.
The main compartment comes with three customizable dividers. I only ended up using one, making one compartment for my camera and the other for another lens.
The front of the bag has a large zippered compartment with practical organizers inside. Here I kept three filters, two spare batteries, a pen, gray card, cleaning cloth, moist cleaning wipes, and extra SD card.
Two elastic mesh pockets are on the very front of the bag. I only used one of these to hold the solar charging cable for the camera.
Final Thoughts
Think Tank isn’t the first name that comes to mind when people think of camera bags, but the company is definitely on the leading edge of camera bag innovation.
This bag was the perfect fit for me on my trip. It was comfortable, held just the right amount of gear, protected my camera, and was very affordable. Both the bag and my camera inside it arrived at the summit of Mt. Whitney after three weeks, in great condition.
I’m looking forward to many more treks with this bag – 2,650 miles on the Pacific Crest Trail next?
Purchasing Options:
Think Tank Photo – $59.75
Amazon.com – $64.75

